Andy Hills' 1981

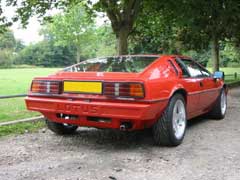
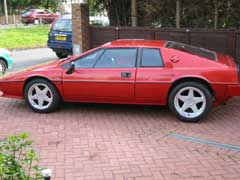
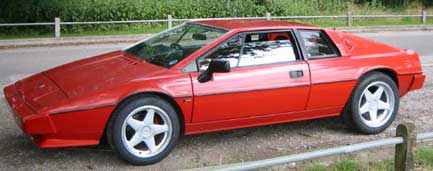
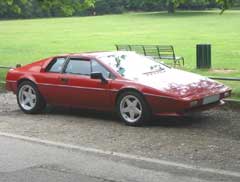
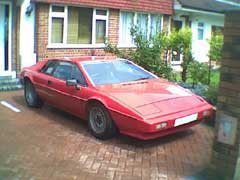
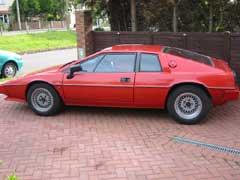
Andy Hills from Shepperton, Surrey, UK owns a 1981 S3 in Red, with a Black/Red interior.
Model:
Year: Colour: Interior: Driving Style: Miles per year: Owned Since: Purchase from: Serviced at: Other Cars: Previous Lotus': Why an Esprit: Upgrades: Problems: Info:
The car was purchase in May 2002 as a non-runner but complete.
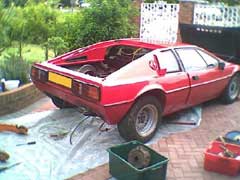
The previous owner had been driving it when he lost all power and water started overflowing out of the header tank, but it still ran. When the engine was removed it was found that the head gasket had failed (hence loss of power and water problems) and that is as far as the repair got. When I first saw the car it was in about 20 bits scattered around a barn. After purchase, the car was loosely bolted back together by the seller before I picked it up so at least I would know where all the parts went.
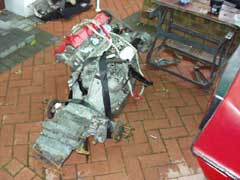
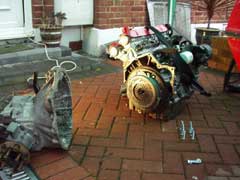
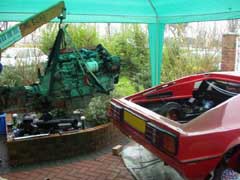
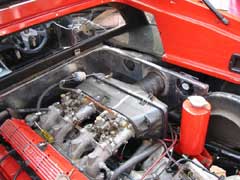
ENGINE
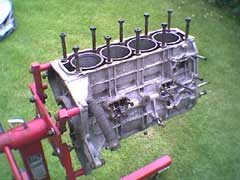
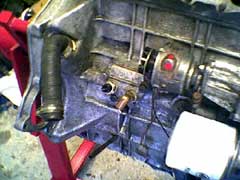
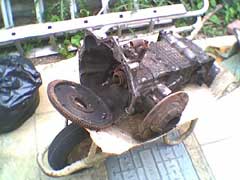
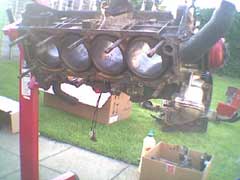
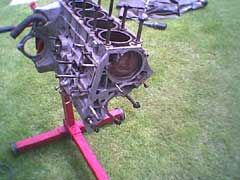
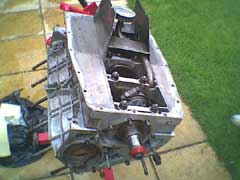
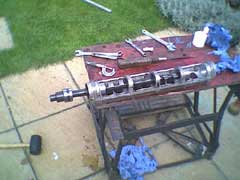
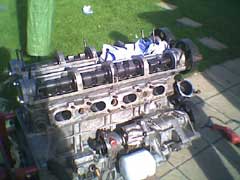
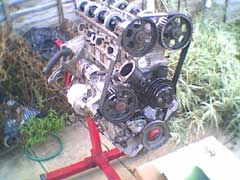
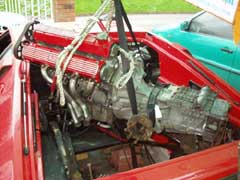
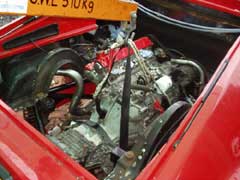
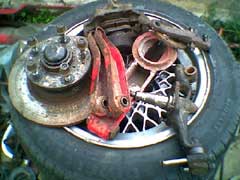
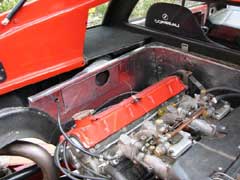
The first job was to get the engine/transaxle out and have a good look at the damage. As you can see from the pictures is was in need of a good clean.
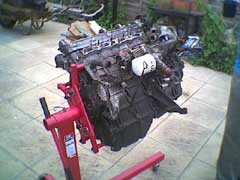
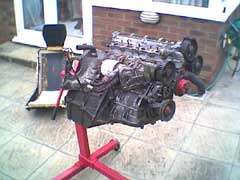
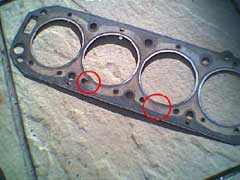
When the engine was stripped it was found that the head gasket had failed on the two inner pistons. Further inspection of the block revealed that there are 2 gasket location pins which had corroded way so that when the cylinder head was last replaced, so the gasket was not in the correct position and hence the failure.
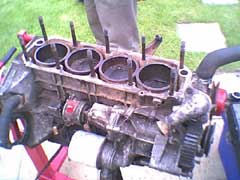
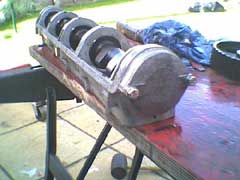
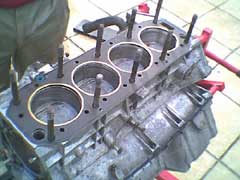
Block
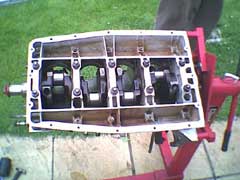
The engine was completely stripped, cleaned and thoroughly inspected for wear and defects. The block was in good condition and all that was need was a honing of the iron liners.
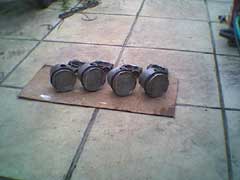
 The crank was fitted with new main bearing shells, and the cleaned pistons fitted with new piston rings and big end shells.


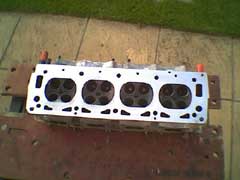
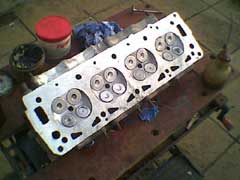
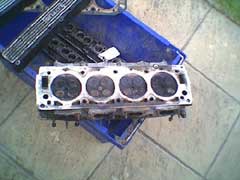
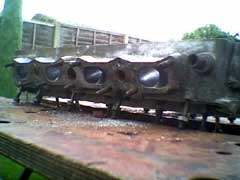
Cylinder Head
The cylinder head was stripped and skimmed to ensure it was flat and not corroded/cracked.
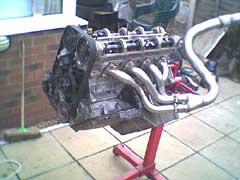
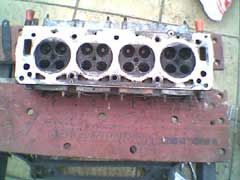 The head was then mildly ported and polished to remove any casting marks and to improve gas flow a little. The inlet ports have been widened to match up with inlet manifold and the exhaust ports have been smoothed out (removing quite a few sharp edges) and widened to match up with the tubular exhaust system.
 A re-profiled set of fast road cams were fitted. Due to the re-grind, oversized cam follower shims were required.
Engine Assembly
The cylinder head was re-fitted to the block and the oil system was then primed with an electric drill to reduce any bearing wear when the engine was initially started.

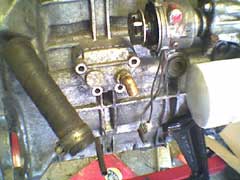
Oil Pressure Switch
Lotus in their wisdom decided not to fit an oil pressure light, which I feel is essential. Therefore the oil pressure gauge transfer plate was drilled and tapped to accept an oil pressure switch to complement the dash gauge.
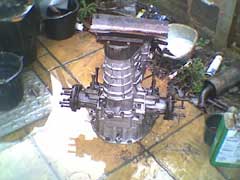
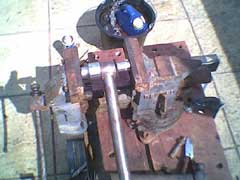
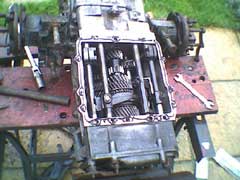
 Transaxle
The transaxle was inspected for wear and it turned out to be in good shape after a good clean.
 A new clutch was fitted and the engine and gearbox mated together.
Engine Fitting
Now all that was needed was to re-insert the engine and drive train back into the car.

CHASSIS/BODYWORK
The main reasons for buying an S3 were: -A) The galvanised chassis, which reduces potential rust problems
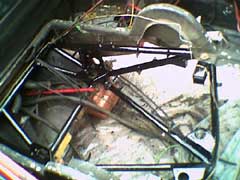
B) The modified chassis design which added extra upper links on the rear suspension
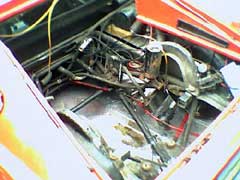
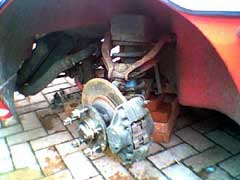
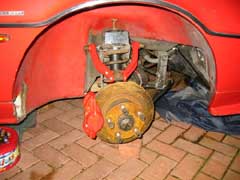
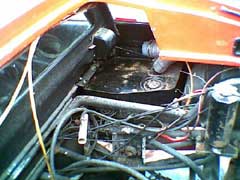
As the engine wasn't in the car when I first looked at it, I was able to get a good look at the rear of the galvanised steel chassis. It was in very good condition (but very scruffy looking) with no rust anywhere. The old paint was removed and a coat of black Hammerite made it look like new.
 Rear Suspension
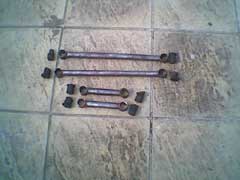
The 1/2" UNF mounting bolts for the rear suspension components were very corroded and required cutting to enable the rear suspension to be removed from the car. Once the rear suspension was removed it was disassembled and paint stripped.
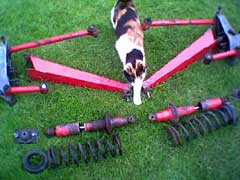 New rubber bushes were fitted (probably the most difficult job to do on the whole car...) along with new washers and mounting hardware.
 Front Suspension
The front suspension was in for similar treatment with new bushes, trunnions and mounting bolts.
Steering
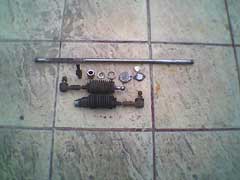
The steering rack was stripped and fitted with new bearings, re-adjusted ball joints and new gaiters.
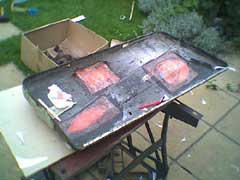
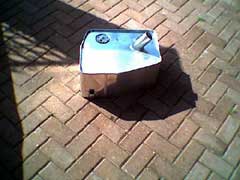
 Fuel Tanks
The fuel tanks were removed while the engine was out and found to be in poor condition having been repaired once already. Considering the amount of effort they are to get out with no engine fitted, I replaced them with alloy units to prevent future corrosion problems.
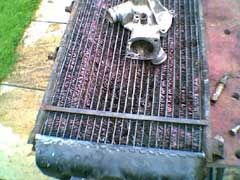
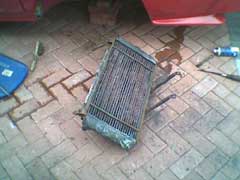
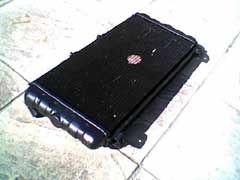
Engine Cooling
The old radiator was very corroded and has now been replaced with a high capacity triple core unit to improve cooling. The water pump was also leaking so new bearings and seals were fitted.
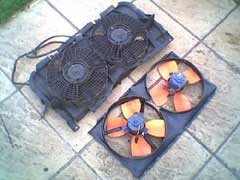
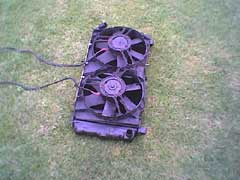
 The old radiator fans and cowling were in poor condition with one fan motor seized, the mounting frames rusty and the ABS cowling broken beyond repair. A set of Peugeot 205 diesel fans and plastic cowling (which are a close match to the originals) have been fitted as these have a flow rate of about twice that of the old fans.
 I also discovered that the GRP radiator duct was missing (probably broken beyond repair by a previous owner) and metal straps now held the radiator in position. The duct is used to channel air through the radiator and cooling is seriously compromised without it so a new radiator GRP duct was fitted.
 The engine bay covers have been stripped and re-lined with aluminium foil. To help prevent overheating, the engine bay vacuum extraction vents have been fitted with axial fans to remove hot air from the engine bay when stationary and these continue to run for 15 minutes after the engine has stopped to improve hot starting.
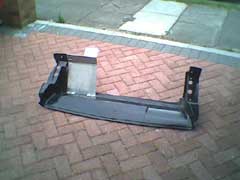
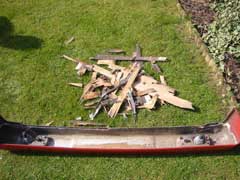
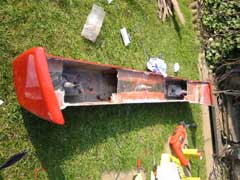
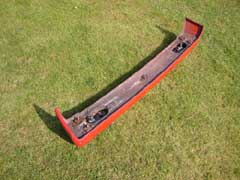
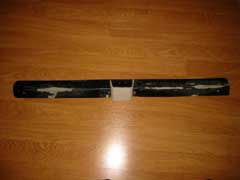
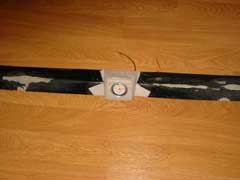
Front Bumper
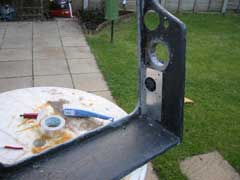
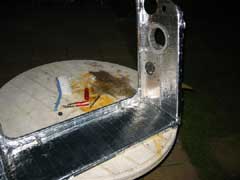
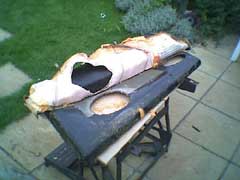
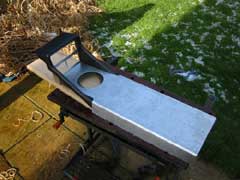
The front bumper needed to be removed to investigate a front light and indicator problem. Further inspection of the bumper revealed that the rear structure (made from plywood) had completely de-laminated.
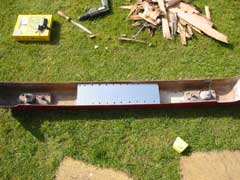
 The old plywood was removed and new alloy panels were glassed in.
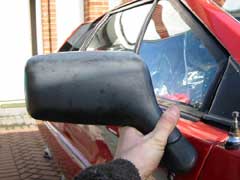
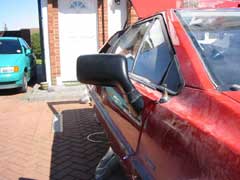
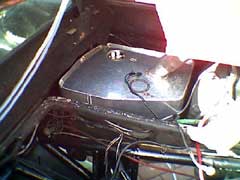
 Door Mirrors
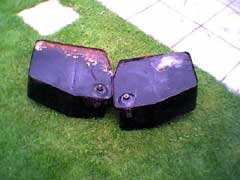
The door mirrors were cracked, corroded and the solenoid adjustment mechanisms had seized. The OEM mirrors are very hard to come by so replacements needed to be sourced. The closest alternatives found were units from an Audi 80. These mirrors have motors for mirror movement and also heaters, however, new base plates would be needed to match up to the Espirt's door profile.
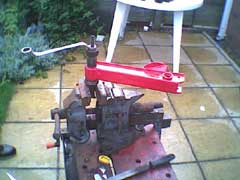
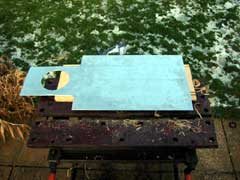
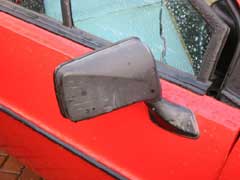 The new base plates were made by constructing a mould and pouring in epoxy resin which, when hard, was shaped to fit the doors.

Wheels
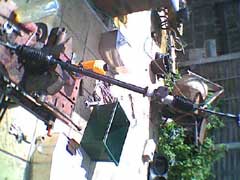
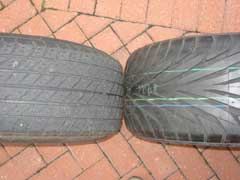
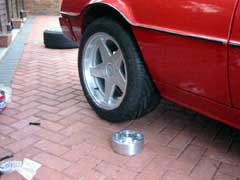
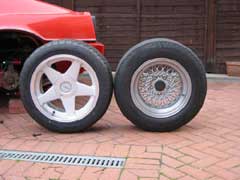
The car was fitted with the 15" BBS Mahle alloys with Goodyear NCT tyres. The wheels were OK but had a few kerbing marks and they needed re-painting. The rear tyres are also becoming very difficult to obtain so I decided to replace the wheels for larger items, which would allow the use of more commonly available tyre sizes. I did not want to go too radical with the tyre profile so opted for 16" rims on the front and 17" on the rear. To keep the overall gearing the same meant that the best tyre sizes were 205/50 16s front, 245/45 17s on the rear. The next issue was wheel type as the 'G' Esprit has an unusual offset on the rear (ET-20) due to the inboard brakes. Wheels available in this offset are hard to come by except as split rims which are very expensive and also look smaller than their size due to the rim bolts. The wheel I chose were Azev type 'A's, however these are only available up ET13 for the 17" rim and so hub-centric spacers would be required for the rear.Here you can see the new and old rear wheels side by side. The overall diameter is the same but the tyre profile is lower and tread width much wider on the new tyre.
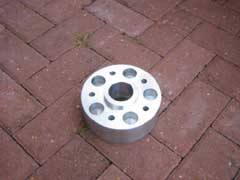
 To get the rear wheels to fit, a pair of hub-centric spacers were required. As custom spacer had to be machined, I also took the opportunity to increase the rear track by 20mm each side to bring the rear wheel closer to the edge of the wheel arches. To help reduce un-sprung weight, the spacers were machined from lightweight 6082T6 aircraft grade alloy.
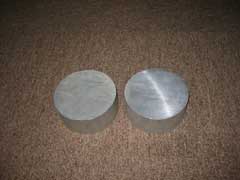 The spacer attaches to the rear hub using the original wheel bolts. The wheel then bolts to the spacer using new studs and nuts.
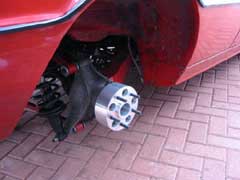 From these two pictures you can how new wheels look against the old.
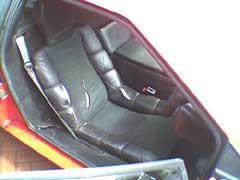
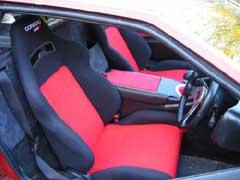
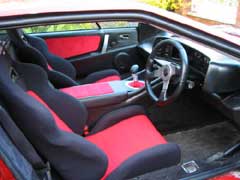
 INTERIOR
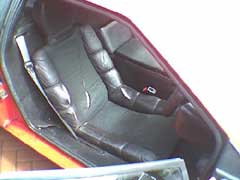
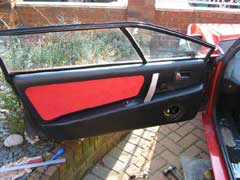
The passenger compartment of the car had been vandalised at some point with the seats being quite badly slashed. Also the headlining was hanging down in places and a previous owner had cut huge holes in the door panels for speakers. With all these problems I decided it was a good excuse to completely re-trim the interior.
Door Panels
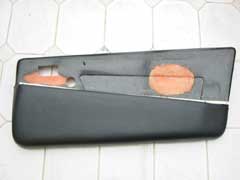
The door panels were removed from the car and totally stripped. All of the existing holes (include the Maxi door handles) were re-glassed to allow re-positioning of the internal fixtures.
 The door panels were recovered to include Alcantara type inserts to match the new seats.
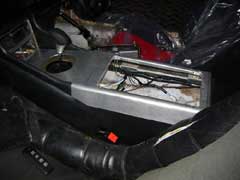
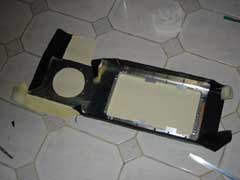
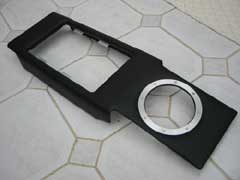
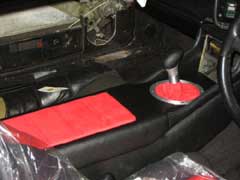
Centre Consol
The centre consol was in poor condition. The leather around the radio/air vent surround was badly marked, as was the electric window switch housing and the elbow rest had collapsed. So a new centre channel cover was fabricated using aluminium and together with the radio surround, recovered to match the door panels. The electric window switches were to be replaced with a new custom current sensing window controller and the new window switches were relocated to the doors.
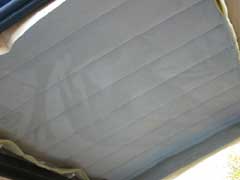
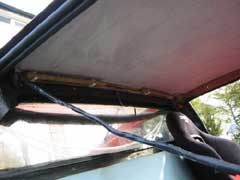
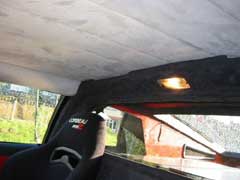
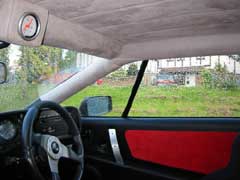
Head Lining
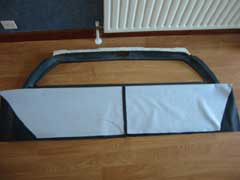
All of the headlining material had disintegrated and needed replacing. The entire interior roof panel was recovered along with the cant rails,upper windscreen beam and ëAí posts in the same fabric used on the door panel inserts. The old digital clock was replaced with a new one, which is more in keeping with the new interior.
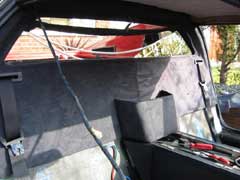
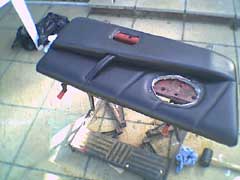
Rear Bulkhead
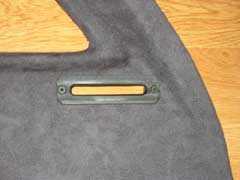
The rear bulkhead cover was also needed recovering as the old vinyl had shrunk and split, looking tatty.
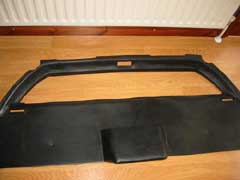
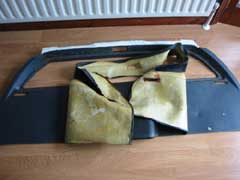
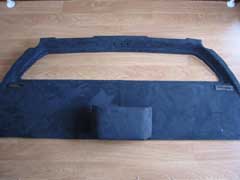
Even the seat belt guides in the rear bulkhead cover had fallen apart, so replacements were milled from solid blocks of plastic to go with the new seat belts.
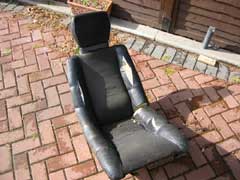
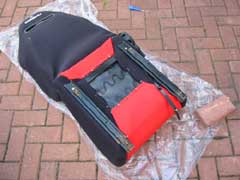
Seats
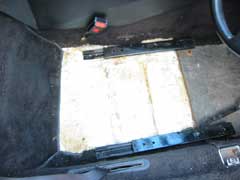
As the seats were quite badly vandalised they were replaced with new units which included a backrest angle adjustment. This would allow a more comfortable driving position to be found. The old runners just bolted to the bottom of the new seat. New mounting holes were drilled into the floor area and the new seats were bolted in place.
There is still a lot of work to do but here is a list of the work done so far
Engine
Complete strip down
New crank and big end shells
New piston rings
New oil pump
New water pump
New coolant hoses
Cam tensioner service kit
New timing belt
2 new exhaust valves
Re-profiled cams
New Stainless Steel 4-1 manifold
New exhaust manifold studs
New stainless Steel exhaust intermediate pipe
Dellortos re-conditioned
Re-assembled starter motor
Re-assembled alternator
New clutch assembly
New clutch master cylinder seals
New clutch slave cylinder
New Stainless Steel clutch hose
New engine mounts
New engine mount heat sheild
Fit fuel injection system and mapped ignition
Body/Chassis
Engine bay srtipped and re-painted
New rear suspension bushes
New front suspension bushes
New front trunions
Steering rack stripped and new bearings fitted
New brake seals
New brake pads
New brake pipes
New handbrake cables
New alloy fuel tanks
New fuel tank breather pipes
New triple core radiator
New GRP radiator duct
New radiator fans
Re-assembled headlight motors
Repaired front bumper
New LED rear number plate lamps
New current sensing electric window controller
New Azev 'A' alloy wheels and Toyo Proxies T1-S tyres
Interior
New steering wheel
New pedal rubbers
New Corbeau RS2 seats
Re-trimmed door panels
Re-trimmed centre console
New headlining
New clock
New seatbelts
New gear knob
Work left to do.....
New instruments
New adjustable suspension
New front brake disks and callipers
New rear exhaust box
Fit stereo system
Respray
|
|