Sports Exhaust Install
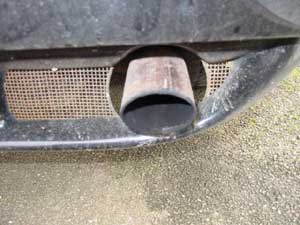
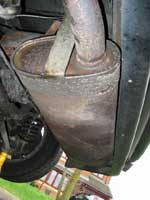
Esprit aren't known for their Exhaust note. Sounding more like a family car than a supercar. So after hearing from others how nice sounding an Esprit Sports Exhaust can be I was tempted to upgrade. My Exhaust looked like it had been on the car since it left the factory (very rusty) and an internal baffle was loose. So I decided to do the job myself (with help from 350 Phil). I chose a Stainless Steel Sports Exhaust from SJ Sportscars (around £200 ($330)). This would increase performance by around 5bhp (estimated), reduce the weight of the Esprit and make the Esprit sound more sporty. Also being Stainless Steel, I wouldn't have to worry about rust eating it away. In theory, this exhaust should last the life of the car.
There are other sports exhausts available for the Esprit as well as a new original. You can get some firms to make a customer system to your own requires. Fitting will be the same for all of these, except those with twin or quad pipes. These require modification to the rear valance. I chose not to go down this route as these pipes are purely for visual affect.
After researching Exhaust upgrades, I decided also to remove the Catalytic Converter. There are a few reasons why I decided to do this. Firstly as I was removing the Exhaust this was the best time to do it. A gain of around 10bhp after removal is always a plus. I'd already had a new manifold, so by replacing the CAT I would have a completely new Exhaust system which will hopefully last the life of the car (manifold's the only real weakness). An increase in Exhaust sound and a hope of seeing the odd flame out the rear sold it to me.
I purchased a Cat-Bypass-Pipe from LotusPerformance (around £140 ($230)), which also replaces the EBPV and bolts directly onto the Exhaust. You can get a shorter pipe to leave the EBPV on, but as I was going for the Sports option I decided to remove that as well. The pipe comes with a plug, but as yet no nuts & bolts to connect them. I purchased new nuts for the Turbo end. You could use the ones you take off, but is better to put new ones on. I also got new nuts & bolts to attach it to the Exhaust as I couldn't use the originals as I was removing the EPBV. These were supplied by SJ Sportscars (around £7 ($12) in total).
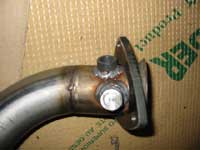
EBPV = Exhaust Back Pressure Value. Used on start-up to heat the engine up quicker for better emissions. Mainly used for US emission tests. Will not effect the Esprit if removed.
|
You will need the following parts: Stainless
Steel Sports Exhaust |
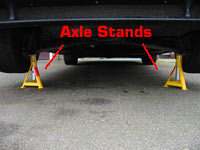
You will need the following tools: Axle
Stands and Jack
|

Parts supplied by:

&

Perpetration
As my Exhaust system was removed at the Turbo just over a year ago to replace the manifold, my nuts & bolts at the Turbo weren't going to be as bigger problem as they could be. But to make sure things went as easily as possible, I sprayed WD40 on these and the Oxygen sensor everynight a week before the installation. I wouldn't advise this if you're going to be driving it. I also sprayed the bolts at the EPBV and the Exhaust mountings.

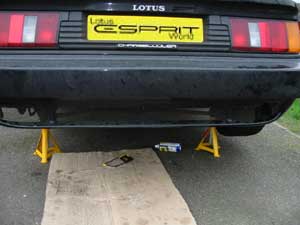
Loosen the left-rear wheel bolts, so you can remove the rear tyre once it's on the axle stands. I jacked the Esprit up where to axles meet and used axle stands (£10 a pair) to keep the Esprit safely raised. Remove the left-rear wheel and also remove the heatshield. This requires 10mm spanner. Mine was badly rusted and a bolt was snapped. I re-drilled the hole and used a spare nut & bolt I had when the heatshield was replaced.

Removal
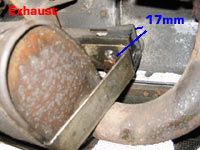
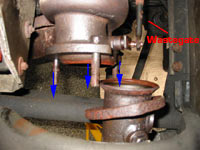
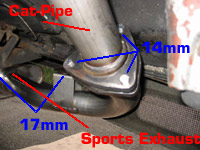
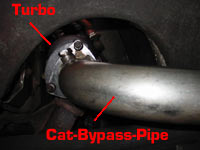
It's now time to remove the old Cat-pipe, Cat, EBPV and Exhaust. I started by loosening the Oxygen Sensor (22mm) and the three Turbo nuts (17mm). These were easy to remove, but can be really difficult. A new Oxygen sensor is around £80, so be careful when handling this.
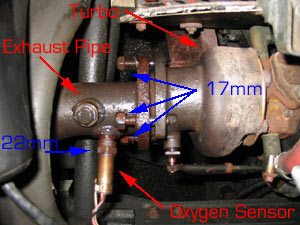

The threads off the Turbo are part of it. So don't damage these. I'm not sure what the options are if this is damaged, but it could mean a new Turbo housing. Take advice on removing these nuts if you start having problems. Leave everything attached while you move your attention to the Cat.
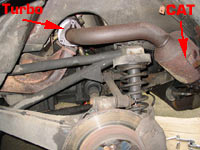
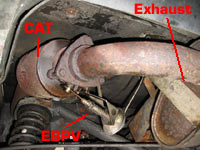
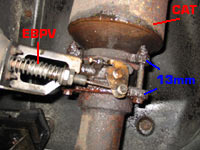
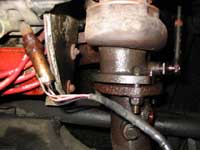
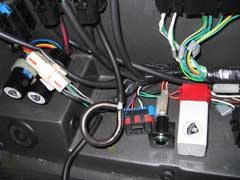
Next Stop is releasing the Cat from the EBPV. These three nuts & bolts are 13mm, but we found that an imperial half inch worked better. These freed up OK from the housing, but the nut was welded onto the bolt. We couldn't free them, so we decided to look at them when the whole system was removed.
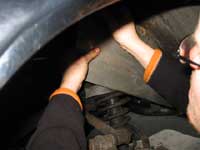
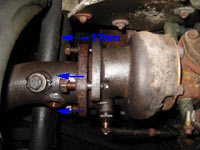
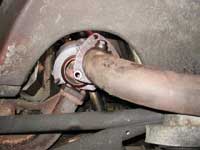
We moved onto the Exhaust mountings. There is a mounting each end of the Exhaust with a 17mm nut & bolt. One is easily accessible from underneath the Esprit. The mounting on the exit pipe end is very difficult to see and with limited space to work. You'll need two spanners as the nut and bolt will spin together. There's no space to use a socket. The fixing nearest the Cat was removed easily, well I say easily, but you can only turn it about an eighth at a time, so it took a while.
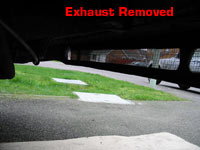
As for the other side! I had the same problem as with the EBPV. The nut was welded to the bolt and with access very poor we were having no luck freeing the nut. The mounting is on rubbers and we didn't want to force it for fear of snapping the mounting. As the Exhaust was going to be thrown, we took drastic attraction. I borrowed a small angle-grinder! Goggles on, I cut the mounting on the Exhaust. I also cut the pipe the other end as I still hadn't freed it at the EBPV. This meant that the exhaust was now free, other than the seized nut & bolt.
I could now roll the exhaust forward on its mounting for better access. We still couldn't free the nut, and there wasn't the space to cut the other mounting. So out came the hacksaw. We cut the bolt in-between the two mountings. This took about 30 minutes, but freed the Exhaust without any damage (well the Exhaust was damaged).
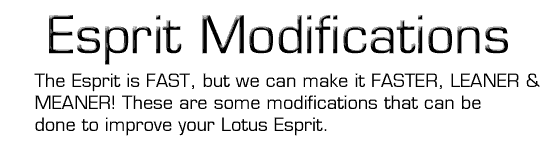
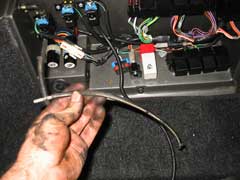
Now the Exhaust was free. We removed the Cat pipe with the EBPV still attached. This comes out easily.
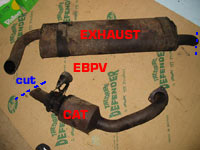
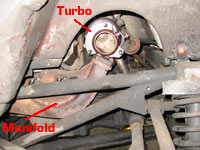
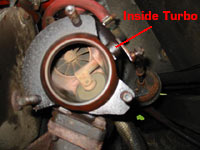
As you can see from above, the old system was covered in rust. The Cat and Pipe can be kept and put back on to meet regulations. Also note where I cut the Exhaust pipe from the EBPV. Once everything is removed you can see right into the Turbo. Worth checking all your fins are still in place.
Installation
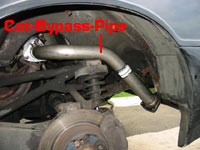
Once everything is removed it's time to put the new parts on. Screw the supplied plug into the hole on the Bypass-Pipe (22mm). This goes into the left hand hole. This is used to check/adjust the EBPV . Now feed the Bypass Pipe in through the wheel arch and onto the Turbo bolts. Loosely add the nuts to hold in place.
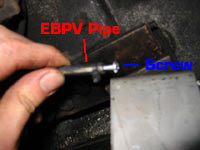

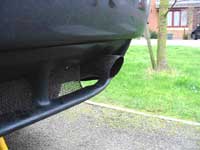
Next add the Exhaust. Feed the end pipe through the hole in the rear valance and push the bolts (which are fixed to the Exhaust) through the mounting points. Loosely attach the two nuts to hold the Exhaust in place. While you're under the car you can add a screw into the EBPV pipe to block it off. Then make sure the pipe is fixed out of the way of any moving parts.
You'll also need to block the EBPV pipe with a screw (see above) or more neatly by using a T-piece to block the pipe (see below).
Pull the hose back into the Esprit from the EBPV. You can then cut it short and use a T-piece to turn it back on itself, blocking the hose.

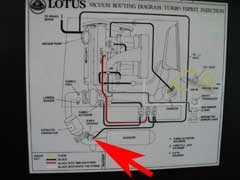
You can then neatly place it behind the other hoses in the rear box in the boot of the Esprit. If the pipe is not blocked, then you'll find your pump that gives the vacuum for the valve will continuely run and eventually burn-out.
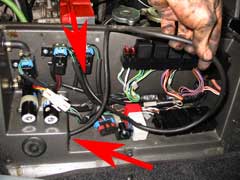
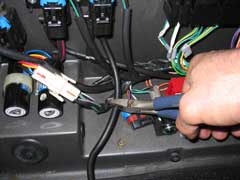
You may also want to remove the vacum capsule that's attached to the throttle cable. This can cause idle problems if it starts to fail. See more about removing that in the EBPV technical page.
Using your new nuts & bolts attach the Exhaust to the pipe. Gradually tighten each nut, so you don't pull the fixing to one point. Next tighten up the Exhaust mounting bolts and then the Turbo mounting bolts. The system needed a little pushing and pulling to meet up and was eventually pulled together as the nuts were tighten. Make sure the system is too close to the suspension.
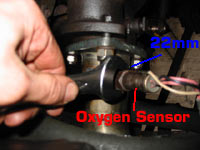
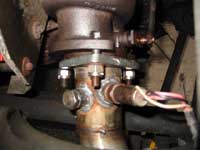
You can now replace the Oxygen Sensor. This is attached by 4 wires. To reattach it, turn the Oxygen sensor anti-clockwise to wind-up the wires. Then when you screw it back in the wires will unwind leaving them untwisted.
The Oxygen sensor should have anti-seize compound applied to it. I use some copperslip, but don't contaminate the sensor tip. Also Lotus advise renewing the washer (A910E7001F), but after seeking advice, I was told this wasn't really necessary. It should also be torque tightened to 38-46Nm (28-34 lbf.ft).
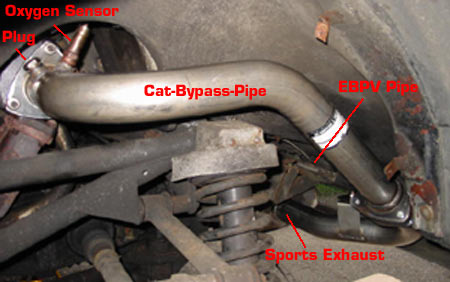
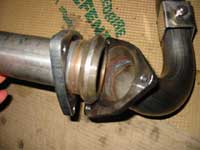
As you can see from above the new system is a lot smaller and lighter. If you choose to leave the EBPV on, you will need to attach this in-between the Cat-Bypass-Pipe (shorter version) and the Exhaust. I wouldn't advice putting it back on.
Check all connections are tight and everything has been replace. Make sure the EBPV pipe is tuck away and the new Pipe isn't fouling any of the suspension.

You can now replace the heatshield and the rear wheel. Copperslip the wheel bolts before replacing them. You can now take the Esprit off the Axle stands. Start the engine and listen to your new sound track. Test drives should be fun, but wait for the engine to warm before opening up. Once back, wait for everything to cool before checking connections.
LEW's Verdict
When the Exhaust and Cat-Bypass-Pipe were delivered, we weren't impressed with the welding. Both items (from different suppliers) were really let down by this poor welding. But this shouldn't affect their performance (not sure about long term), there just not very nice items to look at. The threads on the Bypass Pipe were also poor, so be careful when putting the plug and oxygen sensor in. It would be best to have these re-tapped, but you'll need a big die & tape. We managed to get away without doing this.
The installation is easy, what's difficult is removing the old system. With so much rust over everything and most of the nuts & bolts very stiff if not seized, this will cause the most problems. I was originally intending to keep the original exhaust, in case of problems or track-day sound limits. But after seeing the state of it and not being able to remove it in one piece, I won't be using it again. As for the CAT, we will be keeping this as it may need to go back on for MOT's. We will have to remove the remains of the Exhaust pipe and tidy it up a little but it should be a straight swop for the Bypass-Pipe.
The sound from the New Sports Exhaust wasn't as loud as we'd expected it to be, but was much deeper and more throbbing. We didn't really want a really loud system, just a more sporty sound. It's a great improvement on the original sound and has done what I set out for it to do. Visually there is little change. The new pipe is shinny, but the same size. We didn't want a massive pipe and wasn't that interested in changing the look of the car. Twin pipes are available from other companies, but that requires valance modification.
The new system which should add around 15bhp (estimated) makes a massive difference on the road. Added with the extra noise, the performance increase is easily noticeable. The Esprit pulls much harder and faster as the turbo cuts in. The system may add 15bhp, but the added torque makes the real difference, feeling like an extra 30bhp. You won't be disappointed with the performance increase. It put a real big smile on our faces.
We are really pleased with the system. Performance is wonderful, the noise is great. The Stainless Steel System is lighter than the old steel one and with the CAT removed (and EBPV) a large weight loss of 13kg, which will help performance and mpg. Costs are around £400 ($650), which isn't really cheap, but you'll need to replace your exhaust at some point. So why not Do-it-yourself with a sports system. We did!
![]()
![]()
|
|