
Rear Brake Discs Upgrade
320mm Rear Disc & Bells
With all the V8 wheels going on Esprit and new braking kits available for the Esprit. People want bigger and bigger discs. PNM have now release a new 320mm Disc on bells for 87-04 Esprits. These can be fitted to any Esprit with the V8 brembo rear caliper. The Discs come with new brackets to respace the calipers. The disc and bell combination is lighter for it's size, looks much better in the wheel and of course will perform better due to it's size. With the disc so large and fat, you'll need to either fit Elise or Sport 350 rear pads, which are thinner or use a block to rub down your existing pads to fit. This will also give you a new flat surface for the new discs.
This guide can also be used to learn how to change the rear pads on any Brembo equipped Esprit. Obviously just following the bits required to change the pads!
Installation
This isn't too difficult if you've done work on your brakes before, as there's
not need for bleeding. Should take about 1hr minimum per side
|
You will need the following parts: Rear
Brake Discs (pair) |
You will need the following tools: Jack
and Axle Stands |

Removal & Fitting
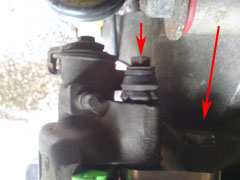
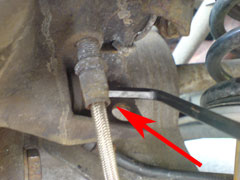
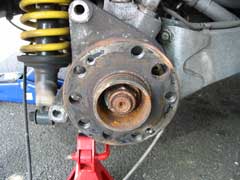
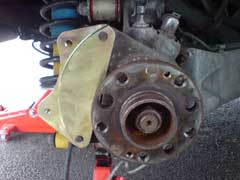
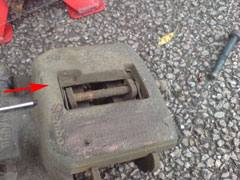
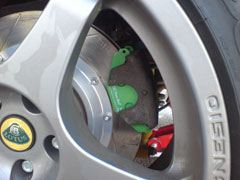
This is a fairly quick and easy swap, especially if you've had the brakes off as many times as we have. After Jacking the Esprit up and removing the wheels you can get at the brakes. Two 19mm bolt hold the bracket on, but you'll find it easier to remove the caliper from the bracket first, which is one bolt 14mm and one allen bolt (see pic above. Red arrows point to 14mm caliper bolt on the left and 19mm bracket bolt).
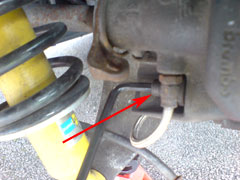
The allen bolt can be difficult to get to as it's covered by the handbrake cable. We used a pair of pilars to pull out the handbrake cable, be careful not to damage it while removing it. You can then remove the bolts and remove the caliper from the bracket. Remember to take the handbrake off! The caliper will stilll be attached via the brake hose. Ours is long enough to rest the caliper on the ground, yours may not be, so you'll need some string to tie the caliper up to support it. Don't let the weight of the caliper hang on the hose.
If you're upgrading from the standard toyota set-up see our guide to upgrading to the V8 brembo set up here.
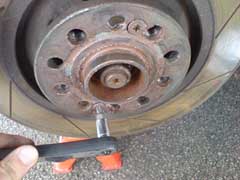
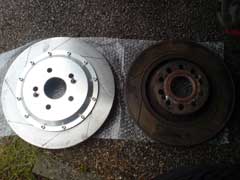
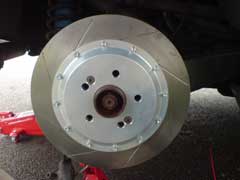
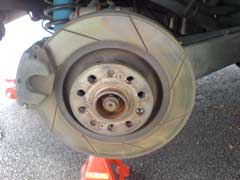
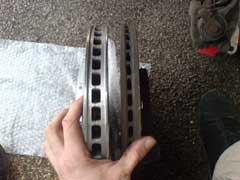
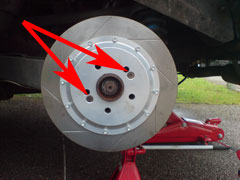
Once you have the caliper off, undo the two screws that hold the disc on. These are star shaped, so you'll need the correct tool. You can buy cheap sets of star keys from most motorshops. You can then remove the old disc, the bracket can be removed before or after removing the disc. The following two pictures show the size difference of the new 320mm disc. Remember the disc next to it is the V8 upgrade kit we installed with the V8 calipers. This bigger disc on a bell is also about the same weight as the non-belled disc!
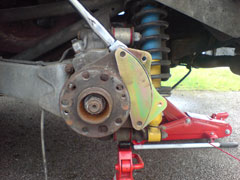
You can now mount the new bracket using the old 19mm bolts which will give you the correct mounting for the new thicker disc. Torque them up to 48 lbs ft. We bought a cheap torque wrench from Ebay to use for jobs like this. Cost was about £20 including p&p. Won't be the best and most accurate, but is better than not torquing up. Make sure you mount it the correct way around, there's a recess for the caliper with needs to be at the top with the bolts going in from behind. See pic above!
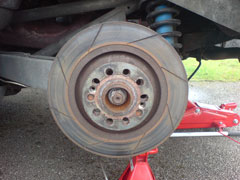
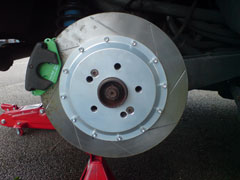
Now to mount the shiny new disc. Make sure all the holes for the wheel bolts line up before screwing in the two holding screws with the star key. You can now sit back and admire your new big disc!
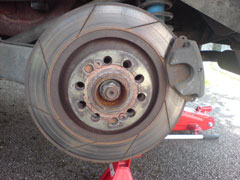
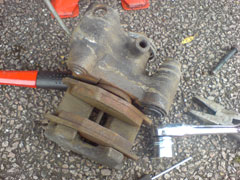
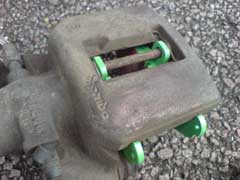
Now on to the calipers. We had Hawk pads from our upgrade kit, but these are too thick for the new disc, even with the piston wound right back in, as we've not worned them down much. So we nicked a set of Green Stuff pads that fit the Elise off my brother, which are much thinner and fit just about perfect. You can use a block and some sand paper to take some material off to fit if you don't want to purchase new pads.
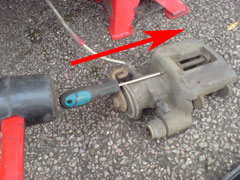
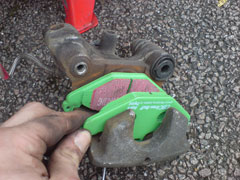
To remove the old pads, knock out the pin that holds the pads in. You can then replace them with the new pads. A more detailed guide to this is on our upgrade to the V8 brembo set up can be found here.
With the new pads in, you just need to mount the caliper. Squeeze the caliper on to the disc, you may need a few gentle taps with a rubber mallet. Line up the holes and torque up the 14mm bolt at the top to 33-37 lbs ft and the allen bolts to 19-22 lbs ft, which we couldn't do with the allen key, so we just did it a little less than the other bolt.
All you need to do now is check all connections and mountings, check for leaks and give the new discs and pads a squirt with some brake cleaner. Replace the wheels, remembering to torque them up correctly and you're ready to bed in the pads according to the manufacturers instructions. Which is normally hard braking a few times from 30mph and then from 50 or 60.
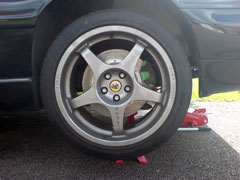
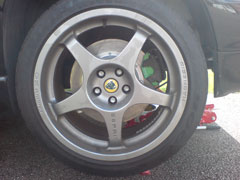
You now have a beautiful rear brake disc, which looks great behind our Sport 350 wheels. We are very happy with the performance and look of our current brake set-up.
Verdict
LEW's verdict on this is quick and simple. They look much better, they're much bigger! What's not to like! Call PNM for prices!
This mod was performed by LEW on their 1992 Esprit SE.
![]()
If you follow this guide or think you can add to it. Feel free to e-mail us with your opinion on it and I can add it to this page. admin@lotusespritworld.com.
|
|