
Esprit Cruise Control Install
Time to get Lazy with the right foot!
by Jim Knowles (95 S4s)
I started out intending to hook the cruise cable up to the throttle body pulley but soon realized after taking the plenum and chargecooler apart that there was no safe way to do it. When you pull on the throttle pulley without pushing the gas pedal the cable tends to come unhooked from the pedal, not a good thing.
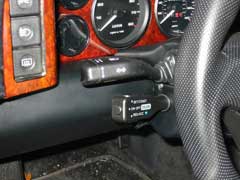
Then I noticed in the instructions (there were several attachment options listed) that the cruise cable could be hooked directly to the gas pedal arm above the pedal. All the necessary attachment hardware was provided with the kit. I was able to mount the control module under the bonnet and route the cable through the bulkhead next to the master cylinder straight to the pedal.
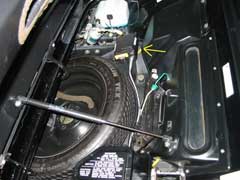
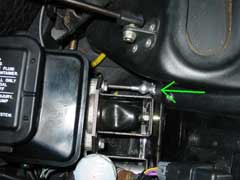
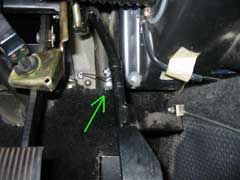
Control module mounted next to spare tire. Cable through the bulkhead. Cable coming through bulkhead and attached to gas pedal
All the wiring went through the existing grommet over the clutch master cylinder and into the binnacle where I needed it. There were 6 wires to hook up, ground off a spare relay socket under the bonnet, brake constant positive and switched positive at the brake pedal switch, speed input from the speedometer wire, tach input from the tach wire and and switched positive that I pulled off of a light switch.
The unit is made by Rostra Precision Controls and was purchased from Dakota Digital (www.dakotadigital.com). I had to get Dakota Digital to special order the control arm from Rostra, the part # is 250-3742 or you can use one of the standard ones from DD although I did not see one that looked right to me.Cost was $210 US for the control unit, $20 for the control arm, and an additional $60 for the optional stainless steel cable which actually was not necessary, but it looks better and makes securing the cable much easier. I recommend the stainless cable option.
The installation was much easier than I originally anticipated.
Control Arm
Tips:
Take the seat out for better access under the dash. The toughest part was getting a 3/8" drill bit and cordless drill between the gas and brake pedals to drill through the bulkhead but mine just barely fit. A long drill bit would have made it a piece of cake.It's a long reach back to the bulkhead to tighten the nut on the collar piece. Someone holding it under the bonnet while you are at the pedals with a long socket extension makes it easier. Take the cable wire out of the collar piece so you can get the socket on.
If your car is 1995 MY or later you have an electronic speedo so you can just tap into the speedometer signal wire at the speedo. If 1994 MY or earlier then you'll need to run a wire to the ECM (or to the Vehicle Speed Sensor harness under the bonnet in some cars)which will make it a little tougher. I used the 8000 pulse per mile setting, with the gain on extra low and it worked great. Final note: There are 12 dip switch settings in the control module. If anyone does the install I can furnish you with the correct settings which will save you a lot of time and frustration in setting it up.The manufacturer installation manual can be found here: www.dakotadigital.com/pdf/dakotacruise.pdf
If you have any comments, feel free to e-mail LEW at admin@lotusespritworld.com
|
|