Sport 350 Spoiler
Installation Guide
April 2006
Esprit's have had many Spoilers sitting on their rears over the years and everyone has their favourite. Currently there seems to be two trends, with some removing them and some fitting their personal favourites to their Esprits. We removed the high-wing off our Esprit a few years ago. After speaking to Lotus about the wings and transom's they advised us that the short transom with no wing was the worst combination. Now we couldn't have LEW's Esprit going against all of Lotus' wind tunnel testing could we!
Time to fit a wing. We didn't want to put an early SE wing on, didn't fancy the S4. We've seen a later V8 wing on an earlier Esprit and didn't like the look as much as the Sport 300/S4s/V8 wing, which looks good, isn't too expensive, but kills all rear visibility, needs spraying. Lotus' testing revealed the Sport 350's carbon wing gives the best stability and downforce out of all the wings fitted to the Esprit. We also loved the carbon, high-level brake light and the modern look. Only trouble is, it's expensive and rare!
We hear of a original wing going from a Sport 350 that had the late V8 wing put on. But at £1500 it was a little pricey. We spoke to SWLC who have a large stock of Lotus parts and they had an original wing off a racecar. I was just the carbon wing and brakelight. It had end-plates on, but they weren't originals and didn't look too good. The wing was in pretty good condition with only a couple of marks on. We purchased it at Donington 2005 and then a little later started sorting out the other parts. In the end we had to purchase new original Lotus parts, which were very expensive, but we finally had a wing to fit.
This should work on any of the Stevens cars not fitted with a spoiler. If you already have a spoiler and wish to change it, then you'll need to have the old holes plugged and resprayed.
|
You will need the following parts: Spoiler |
You will need the following tools: Masking
tape |

The fitting took approximately 3 hours including the wiring.
Installation

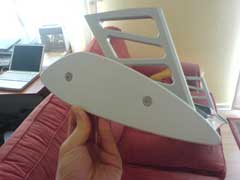
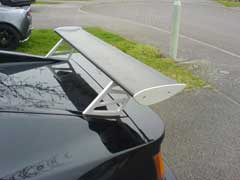
We had to put our wing together as we got everything at different times. Bolting it together is easy. Three bolts hold the each strut to the wing, with a gasket inbetween. Two bolts hold each end-plate on.
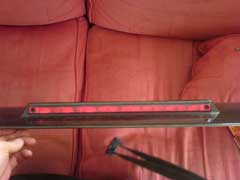
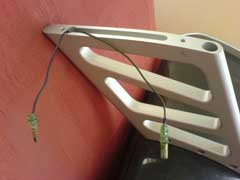

Brake light came with the wing and is held in by two screws. The wires for the brakes light feeds through the left hand side strut. One live, one earth. Ours were black and green.
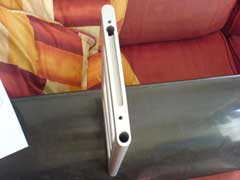
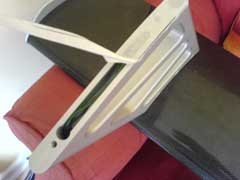
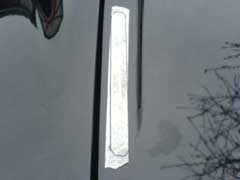
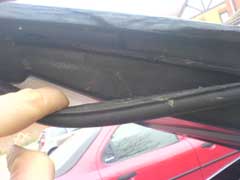
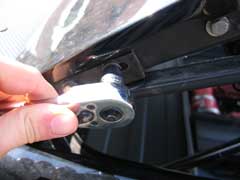
The bottom of the strut has two holes and two threaded holes. The wires for the brake light run down one of the holes on one side. To protect the bodywork and strut we used some masking tape on the bottom of the strut before marking up. This also holds the wires in flat, so it's easy to mark-up.
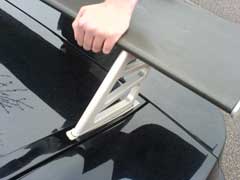

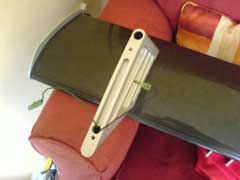
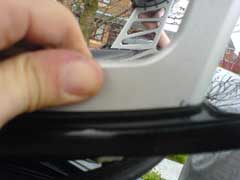
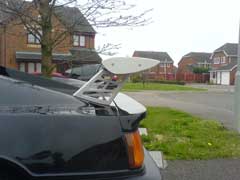
We also placed some masking tape on the bodywork where the wing will be mounted. Get someone to hold the wind in place. We then measured up and made sure the wing was centred on the tailgate. Moving it bit-by-bit to get it in the right place. You can then draw around the strut to show you where it will be mounted.
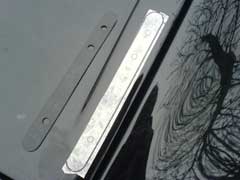
When you remove the wing you'll have the position marked up. Then place the gaskets over the marked up masking tape to mark up the mounting holes.
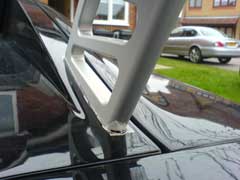
Remember to the the gaskets the correct way around. Ours fitted left and right, so we had to make sure everything was correct before marking up. You're then ready for drilling. You'll need to pull the rubber seal away from the tailgate, so not to drill through it.
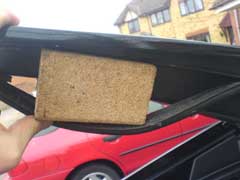
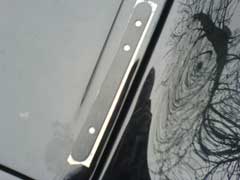
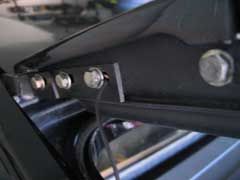
We used a wooden block to hold the rubber away and give us something to drill into. We used a small drill bit first to get the hole in the correct place, before using a large 7mm bit for the mounting holes.
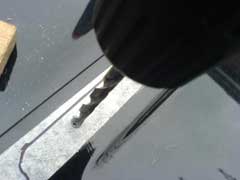
Drill right though the tailgate, which has an inner skin. The masking tape will help to stop cracking of the fibre-glass while you're drilling. Drill 3 holes one side (one for the brake light wires) and two the other. You'll also need to drill a bigger hole on the underside of the tailgate, so you can get the bolt head in. We used a washer to strengthen the tailgate.
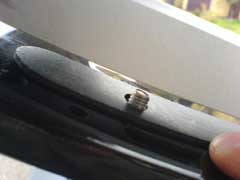
Once you have the holes drilled you can start mounting the wing. We laid the gaskets down and pushed the bolts through, then pull the struts down to line them up. You'll need an extra pair of hands! Tighen up the bolts slowly and evenly, so not to put too much stress on the fibreglass.

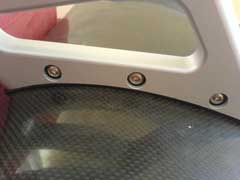
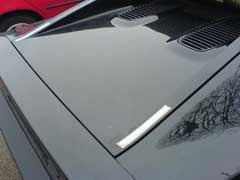
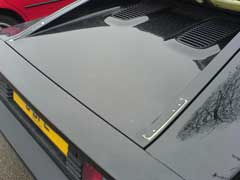
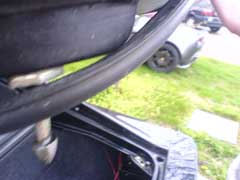
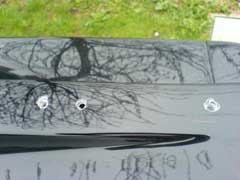
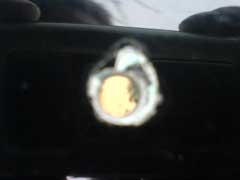
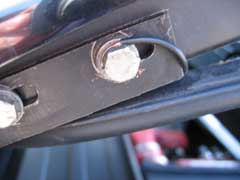
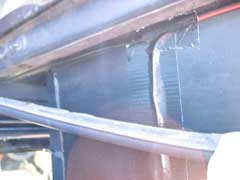
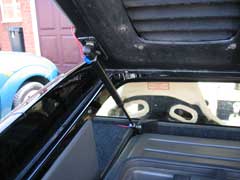
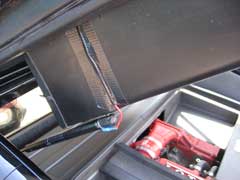
Above you can see a whole from our old wing, the wires coming through for the brake light and the hole for the new wing. Before wiring up the brake light, it's best to check it's working. We attached our wires to it and touched them on the battery to check the light was working ok.
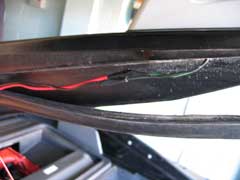
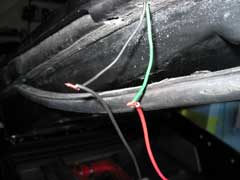
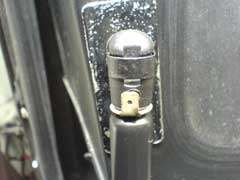
We will be using the latches that hold the tailgate on to earth our brake light, we tested that this would earth the light ok before we carried on. Works a treat. Next we attached our wires to the brake light wires, we twisted them together and taped them up. This was done to keep the connection small, as it will be under the rubber seal.

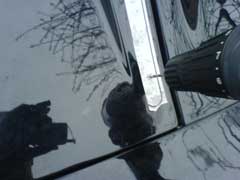
We used some tape to hold the wires in place while we ran them up the tailgate. Our black earth wire ran right up the tailgate to the latches. You can loosen off one of the bolts to connect the earth.
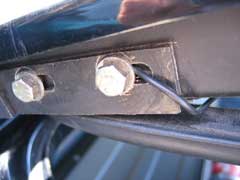
We stripped the wire back, wrapped it behind the washer and tightened up the bold. We tested the connection again to make sure it was earthing ok. Our red live wire was still 5 metres long, so reaching the battery wasn't a problem. How time to get the live connected. We're going to use the free taps on the left hand tailgate strut to get the wire from the tailgate to the cars body and down to the brake light.
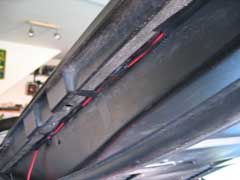
We had a tap top and bottom. If you haven't, then you'll have to get one fitted or solder the wires on. We ran the live wire along the tailgate and then down towards the struts. We used some black duct tape to hold the wire in place. Better than having it flapping about and isn't too noticeable.
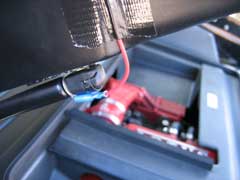
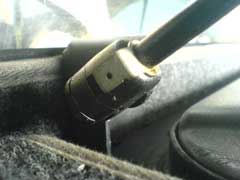
We cut the wire to length and then used an electrical connector to hook it on to the top of the tailgate strut. We the took the rest of the wire and attached another connector to one end and attached it to the tap on the bottom of the strut. The strut will carry the current and keep the connection.
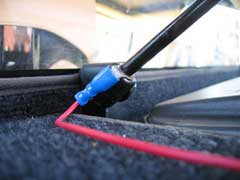
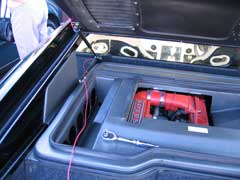
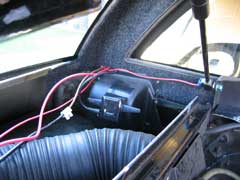
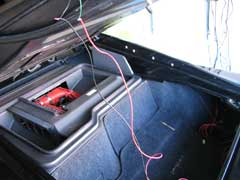
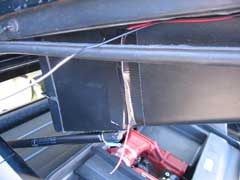
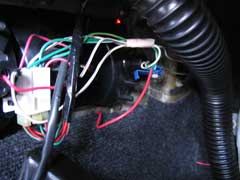
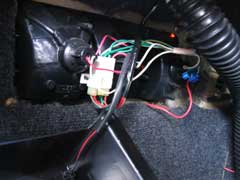
We now have our wire at the bottom of the strut and able to carry on it's way to the rear ligths. We removed the quarterlight panels to conceal the wire on it's way passed the rear wing to the back of the car. You can see our other wires for our amp that runs back to the battery. We followed them to the rear of the car.
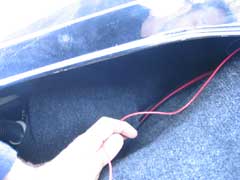
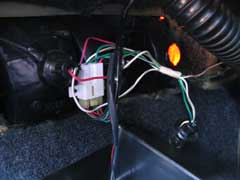
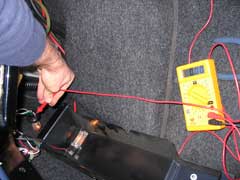
The wire comes out in the boot and can be run neatly down to the rear lights. We tucked it behind the carpet and over-flow bottle and up to the lights. There we removed the backing panel of the rear light cluster to get at the brake light. We pulled the rear brake bulb out to cut into for the live for our wing's brake light. The brake light has 3 wires. One earth (which was white) and two lives. One for the rear light and one for the brake light, as the Esprit uses the same bulb for both rear light and brake light. We used a voltmeter to see which one was which. The green was the light and the green and white was the brake light live.
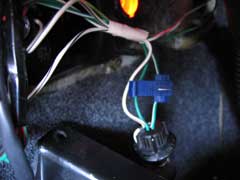
We used a scotch-block to cut into the live. These are the easiest way to cut in to another wire. Put the brake light live in one gap and the new wire in the other. Close the scotch-block and it cuts into both wires, giving you a completed circuit for both your rear brake light and your new high-level brake light. (p.s. we're not great at electrical terms)
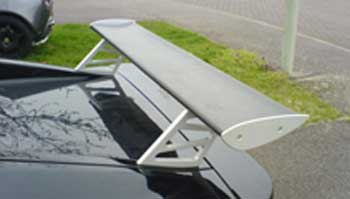
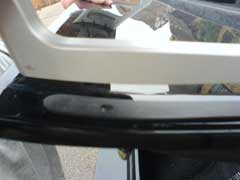
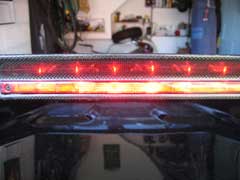
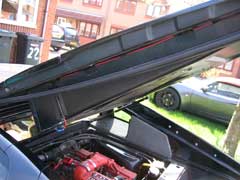
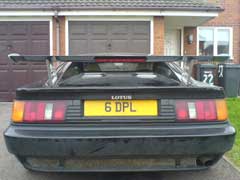
We put everything back together and tested the brake lights. Both work perfectly. We now have a beautiful Sport 350 wing on our Esprit, we a working high-level brake light.
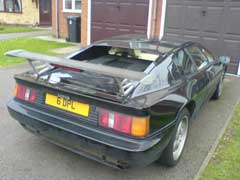
We're very happy with the installation of our wing. Not as difficult as we though. It's also nice to have the extra brake light.
LEW's Verdict
We've always loved the Sport 350 wing. Although it looks very MAX POWER on it's own, when it's attached to an Esprit, it really doesn't look like a bolt-on boy racer wing. We don't know why. We managed to get hold of a second hand wing and ordered the other parts (which are expensive) to complete the wing. It's an expensive add-on compared to the other wings available. Is it worth it. Well we weren't sure until the wing was attached.
The pictures don't do it justise. It really fills out the rear of the Esprit and balances it up a little more. Without the larger transom the SE doesn't quite look the same as the GT3's and V8-GT's. We're very happy with the out come and would have done it much earlier if we could have found one. Fitting isn't too bad. Drilling isn't fun, as you don't really want to be drilling your baby's bodywork! Wiring up the brake light is a pain, but it's nice to have it working.
You may not like the Sport 350 wing, you may think it's too expensive or can't get hold of one. We love the wing, managed to get hold of one and spread the cost of the wing over a year! We're happy, you know it's possible. Guide completed.
This mod was performed by LEW on their 1992 Esprit SE.
![]()
Feel free to e-mail me with your opinion on this guide and I can add it to this page. kato@lotusespritworld.com
|
|