Home
News
Esprit Models
Owners
Esprit History
For Sale
Other Stuff
Roadtests
Buying & Running
Parts & Specialists
Other Esprit Stuff

Alloy Wheel Refurbishment
kerbed or damaged wheels, try these Companies!

BJV engineering
Flaunden Lane
Flaunden
Herts.

tel: 01442 834169
web: www.wheelrefurbishing.com

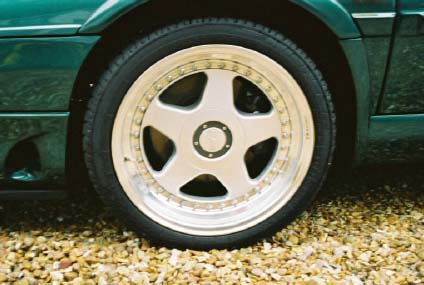
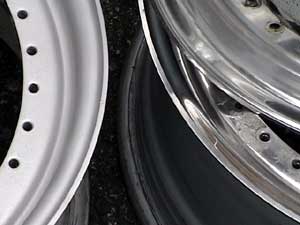
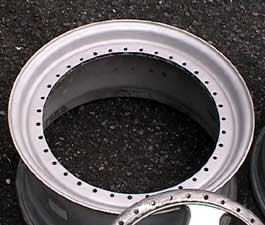
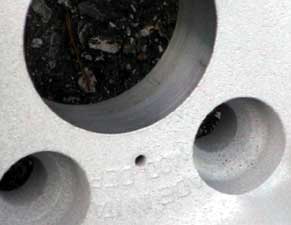
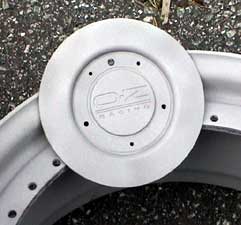
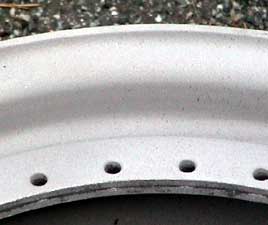
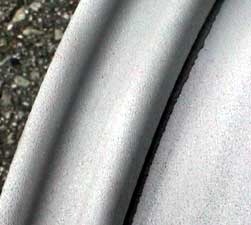
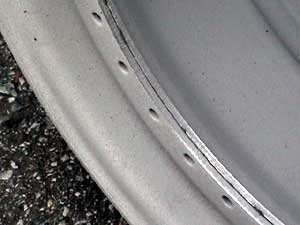
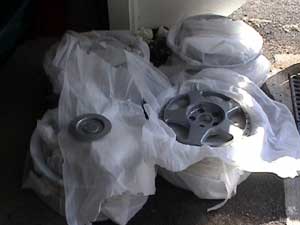
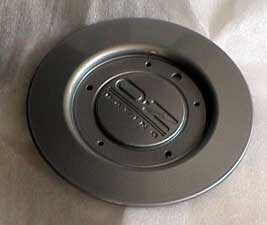
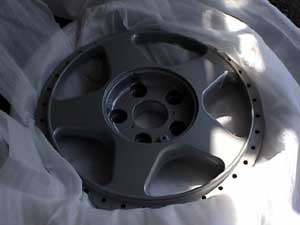
These are the pics of the wheels that i had refurbed by BJV Engineering near Kings langley just off J20, M25.The website is quite comprehensive and quotes prices.

I had trouble trying to split the rims myself as there are no ten point spline tools available as standard, so I phoned O.Z in Germany and spoke to the tech guy, who told me that the german government wont let them sell the tools as there are " Too many Black Sheep out there !" Well, Baaa Baaa !! to the Huns, we are British and resourceful, so I went to work on the web and I came up with a name that I recognised as having raced one of my boats in the eighties , Brian Vallack, a Good Ole Boy and trusted engineer

Phone call later and the wheels are on the M25 and left at the works with other splits and a lot of Aston , Porsche and Ferrari wheels etc.

I saw some that had been refurbed and they looked very good

I asked BJV to take out the old 7mm OZ bolts and I supplied 160 M8 button socket cap screws and nyloc nuts in A2 stainless. ( this means if I want to repolish the rims, I can take them apart without special tools) the costs will vary according to the time taken to polish out the damage but my wheels cost me £260 plus VAT , which I consider to be a very good price. The finish is first class as you can see and the refitting of tyres and new valves and balancing is included. The centre trim rings are laser cut from decorative stainless checkerplate and cost £18 each ( from another supplier) The only advice I have for anyone powdercoating the Oz splits is that the centre caps are such a close a fit that the P/C builds up too much for them to refit into the recess , so machine them down the O.D. by 2 mm before coating.


Pristine Alloy Wheel Refurbishers Ltd
Newport Road
Woburn Sands
Milton Keynes
MK17 8UD
Tel: 01908 282628

Check out their web site for more info on process etc: www.britisha2z.net

Try www.lap-tab.co.uk, they're in Birmingham and recomended by Noble Cars/Lexus/etc. (0121 328 1697)
Manjit
98 GT3

I had some repaired at Metalmagic based in Rotherham (01226 298544). Did a really nice job. I had a 19" wheel repaired and cost £60. Also the wheels on my V8 were all done by same place.

paul

There is some stuff called WONDER wheels Cleaner, absolutely amazing and will eat into all the iron disc dust that is on your wheels, Try Halfords.

you could also try BJV Engineering - Alloy Wheel Refurbishment, call Brian on 07968 023236.

Mark
88 Turbo
www.lotusespritturbo.com

Coatech surface technologies

My name is Ewan smith I run a business in Carnoustie Called Coatech surface technologies and we specialise in alloy wheel refurbishment and have been involved also with the refurbishment of esprit split rims.I can repair and rufurbish your wheels and bring them back to the orginal finish.

I had the same problem with my griffith alloy wheels and what i did was blast cleaned them powder primed the wheels coated them in the original base coat colour and powder laquered the wheels the came up like new and they are now easy to keep by using soap and water i charge £50 for 1 wheel inc delivery back to youself and it takes 2 days my advice for anyone with alloy wheels is try and avoid acid based cleaners such as wonder wheels etc purely from the fact is that it does eat into the laquer and dull them silghtly.

Ewan
Coatech Surface Technologies
Tel: 01241 854911


Esprit OZ Futuras Refurbishment
by Arne Sunde

The car is a 89 non SE. The photos does not justify its colour which is British Racing Green, interior is tan leather.

First the car on it's original rims (above). The reason for the project was simply the non existing rear tire dimension of 235/60-15. After some time making up my mind, I started the search for a set of replacement rims on the net. I quickly sorted out that a set from a GT3 or a S4 would be the best way to go. OZ Futuras was the final choice.

 
Rear Alloy in poor condition

 
Front Alloy in poor condition

The seller sent a lot of photos and "warned" me about their condition. It was a real challenge as you can see from the close ups.

After a long period of time trying to source the proper tool for the very special bolts and nuts, I finally gave up. I simply had to have a tool made. First I measured in detail the bolt and nut heads, they are different in size. Then I made a proper computer drawing of them and at the same time designed the shape of the tool. I designed the tools as inserts to standard 15 and 17 mm wrench sockets. After consulting a friend, who happens to operate a computer controlled laser cutting machine, we decided to cut from 5 mm steel plate. Material selected was AISI 316 simply because he did a lot of cutting from such plates that week. The material should of course have been tool quality.


There are 35 bolts in each rim, that is a total of 140 and each took a couple of minutes to disassemble. It was a real challenge of my patience. Before I started, I soaked the nuts with a penetrating lubricant. I also measured the required torque to release a couple of the nuts.


After all the bolts were dismantled, I wire (brass wires) brushed every single one of them, in particular the heads. I managed an average speed of one bolt per. 50 seconds. My patience at the time was not good at all so I only managed some 20 bolts in a row. Was it worth it? It was. The bolt heads looks like new ones. At this time I still was not sure what to do with the nuts.


After removing all the bolts, the center section of the rims was fairly easy to knock out. A large hammer and some wooden pieces (as impact protection) did the job. Splitting the two outer sections proved much harder so I simply let them stay together, at least for the time being.


Right: shows the machined centre hub of a rim. The centre was machined to 60,1 mm (0, +0,05) this gave a very good fit. It might be just a tiny to tight.


At this stage of the project I was rather frustrated of how to proceed. The outer ring or section of the rims is originally polished and coated with paint. My intentions was to repeat this, but it proved difficult. At the time I considered the following possibilities.

1. Split the two outer sections of the rims in order to be able to treat the parts individually.
2. Leave the two sections together and treat them together.

I decided to give the first option a try. Unfortunately I did not find any paint remover that took away the clear paint. It was possible to grind away with sand-paper, but doing it by hand would have taken forever. I thought about putting the rim in a lathe and then using sand-paper by hand. In the end I had the clear coat removed very gentle by glass blasting. If you look close on the photo you will see that some of the corrosion had left fairly deep marks i the material. Far deeper than what the glass blasting made.


When I tried to split the two outer rim sections, I discovered rather surprisingly that they where stuck quite well together. In fact so well that I decided to leave them together. As all options where tried I brought all parts of the rims for sand blasting. After consulting with the powder coating shop, the sand blasting should be done with a sand quality for blasting furniture, industrial blasting would ruin the aluminium.

The sand blasting took away quite a lot of the surface but the guy doing the job tried his best to calm me down. I threaded all the nuts on a wire and had them blasted together with the rims.

At the paint shop.

One big worry was what might happen with the sealing compound when exposed to the heat from the powder coating. Would it melt or burn? We made a test. First I mad a cut from the remaining compound and left it in the oven at 220 degrees for 30 minutes. It did not melt or burn but my girlfriend almost killed me when she came home from work and the whole apartment smelt of rubber. Next was one of the rims sent through the powder coating oven, but without any powder. No harm done.


All rim parts where then hung up on the conveyor and sent through the washer. After they had dried I had to mask off all the surfaces that should not be coated. In order to save some money, the paint shop allowed me to do this. They even let me do it in their workshop after closing time. The masking job was tedious work, but saving money and not being able to blame a lousy job on others, sounded right in my mind.


Just collected the parts from the paint shop. They had done a fairly good job, there were just some minor flaws. When removing the masking tape some paint followed, but if you don't know you don't see it. What surprised both the guy at the paint shop and me, was the shade of the colour, it turned out much darker than what the sample had been. The colour sample was light silver, but I would describe the colour as it turned out on the rims, as dark gray metallic. I didn't mind, actually I find it quite OK.

Assembly in Progress


These pictures shows one of the rims during assembly. I made marks in all the rim parts prior to disassembly in order to get them all back in the original place. This made the assembly fairly easy but first I had to grind away paint edges caused by the masking tape and paint that had made a lot of the bolt holes to small. I sprayed the nuts with two coats of a sink primer in order to prevent them from rusting. All bolts were tightened crosswise with a torque wrench. After one bolt was tightened it was marked before I continued to the next one. This was done three times to make sure that all bolts were properly tightened. To avoid scratching the paint I had a friend helping me holding the bolts still while I tightened the nuts.


Picture above left shows when I refreshed the treads for the bolts holding the cover in place. Paint had partly clogged the threads but it was easy to remove with a taper tap. If you look closely, one may also see the sealant I added over the split to replace the material that was blasted away. Picture above right shows a completed rim. Due to the heavy paint coat, I had to grind the rear side of the edge on the hub cover, in order to make it fit.

Time to get hold of tires, 215/40-17 and 245/45-17. I called all of the local tire shops and found that prices and availability varied a lot. Finally I settled for Uniroyal Rainsport 1. It rains a lot in my home town. When mounting the new wheels on the car I discovered that I needed longer bolts, I had completely forgotten ( I had read somewhere on the net that I would need longer bolts). Luckily I got hold of some bolts of a suitable length the next day.

Grand finale.


Additional Information

My home town is Bergen in Norway, that is pretty far up north in Europe. The various workshops involved in the project are all locally based and listing their names has not been done due to the rather remote location. The rims were sold by a private person in the UK and delivered by him to a transport agent in UK who shipped them across the North Sea for me. I have made a list regarding all direct cost involved with all details converted to GBP at a exchange rate NOK/ GBP 12,00/ 1,00. Except for the rims which were paid in GBP. NOTE, this project was far more time consuming than anticipated and is not recommended for those with lack of patient. Total costs were kept low thanks to my friends who helped me with shipment and laser cutting.

Description
Cost
Rims
£200.00
Local packing in UK
£19.08
Norwegian VAT
£25.25
Dismantling of old tires
£16.67
Sand blasting
£83.33
Powder coating
£166.67
Tires front incl. assembly
£230.00
Tires rear incl. assembly
£299.67
New bolts
£37.50
Total £1,078.17

UK Alloy Wheel Refurbishment
by Phil Copperwheat

Basically I searched everywhere for a company that could refurbish the S4s alloy wheels and most importantly re-lacquer them, I found a company that can refurbish them, but they won't re-lacquer them as the process is very complex and if you don't get the amount of lacquer spot on it will crack. I've heard of people stripping the splits down themselves and undoing every single bolt and doing a DIY job, I talked to OZ in the US and they seriously advised against this as if you don't get it spot on the stresses passed thought the wheel can make it buckle under high speed cornering, definitely not a good idea.

Other option is to buy a new wheel at £500 a go.

So anyway after lots of research I ended up getting one front and one rear refurbished at a company called "Pristine" they did a great job and the wheels looked the nuts absolutely great, problem is they were not lacquered. So to keep them in good condition you need to wash them regularly and if your leaving it for a week or more you just need to spray some WD40 on them to keep them in good nick. If I had the problem over again I would do exactly them same and get them done without the lacquer.

I paid £110 + VAT per wheel to get the tyres taken off, wheel refurbished, tyre back on, new valve, and balanced. It took one week from dropping them off to getting them back.

Pristine Alloy Wheel Refurbishers Ltd
Newport Road
Woburn Sands
Milton Keynes
MK17 8UD
Tel: 01908 282628

Check out their web site for more info on process etc: www.britisha2z.net

Do not worry about them not being lacquered, look after them and keep them clean and they will be fine, but make sure if it it's left outside for more than a week you spray the wheels and if possible don't put them away dirty. Once you get them refurbished they will look like new and are the dogs bits, look very cool. BUT KEEP THEM CLEAN!!!!


Giugiaro Owners
If you've got BBS silver and gold wheels, here's a couple of tips I've found over the years of ownership. Especially in a British climate, or anywhere likely to have rain I guess ;-)

I stress this is only good for shiney silver - I've seen one or two BBS which have matt silver - Don't do this if your's aren't shiney.

After a good wash and rinse, and on a cloudy day (sorry, Californians!), use silver cleaner (called silvo in the UK). It's got a soft wirey pink cloth inside, soaked in gunk. Rub it in the direction of the wheel and DO NOT touch the gold bits. It's hard work and you need to throw away a lot of cloth as you go. The cloth will ooze grey muck, which is the road-cr@p on your wheels.

Then rub off with a dry lint-free cloth (I use Halford's pack of 20). Then the final trick is to use car-wax, a good quality one. I use Simoniz blue diamond. All over the silver and gold. Let it dry then buff.

That way the wax protects your wheels from the elements. I probably do mine once every year or two, but then it doesn't see much rain.


return to top
home email news esprit models road tests buying an esprit running an esprit esprit owners maintenance pictures for sale history Lotus models links