Replacing Stevens Fuel Pump
by Pete Stone
Replacing the fuel pump on the Peter Stevens Esprit is not as easy as the Giugiaro Model. But it is carried out in a similar way, even if it does take a lot longer. As pointed out in the Giugiaro article, PLEASE take care when carrying out this job, you are dealing with petrol. And it WILL spill, no mater how careful you are!
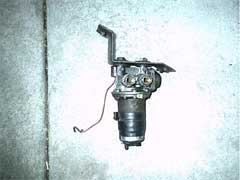
The fuel pump used on the Stevens model is different to the Giugiaro. On cars from 1988 to 1992 they use an electric SU type, similar to Jaguar. The N/A and Turbo versions are different, but the part number for the N/A is AZX 1308. You will also find a further part number stamped on the casting, AUB 662-1. These pumps can be stripped and serviced, but I decided just to replace it. As it looked like my pump had been messed with before, and was now running very slow.
Installation
|
You will need the following parts: Electrical Fuel Pump |
You will need the following tools: Trolley Jack Optional tools:- |
One point I would like to make, is run your Esprit until there’s NOTHING but fumes in the Petrol Tank. This will help you later!
Safety first! Disconnect the battery, this, if you don’t know, is located right at the back of the car just under the driver’s side rear light.

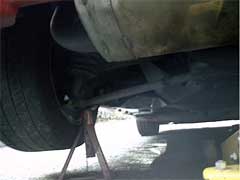
Next chock the front wheels and jack up the rear of the car, then support the car with axle stands. PLEASE do NOT just rely on a jack. You really do not want an esprit landing on you! Even with axle stands, it is always a good Idea to keep the jack in place.
Now, once the car is up and safe, this is where the difference, in replacing the Giugiaro and Stevens Esprit fuel pump, becomes apparent. You now have to remove the passenger’s seat. Undo the four nuts, under the floor of the car, holding the seat in. Store these, with the washers, in a safe place. Remove Seat.
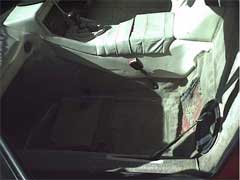
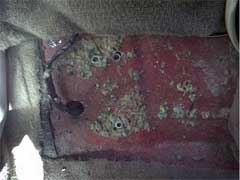
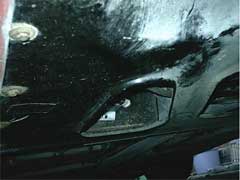
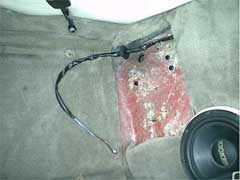
Peel back the carpet and sound proofing from the back of the firewall, to reveal three bolts and fuel pump wiring loom.
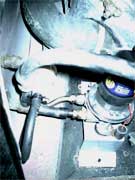
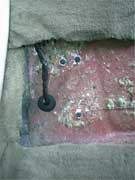
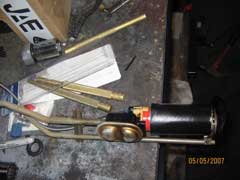
You might not be able to make it out in the picture, but I found that not only had the water proof grommet been pushed through the bulk head, but my old fuel pump was in fact held in by SCREWS! This is the first “bodge” that I have found on my Esprit! I hope I don’t find any more!Now you need to crawl on your back to get to the fuel pump. It is located, behind the passenger firewall, in front of the rear wheel. Please note the unfolded card board box on the floor, to make it a little more comfortable, not by much though!
An other difference between the two model’s is that the Peter Stevens car has a belly panel bolted to the under floor of the car. This can be removed but you may have to raise the car even further to do so. However there are access holes, although it does limit movement and make’s it a little more time consuming to remove the fuel pump. Whether you remove the belly panel or not, is really up to you. I choose not to.
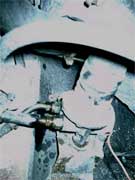
You can just see the corner of the mounting bracket for the fuel pump, through this access hole. My fuel pump was covered in years of road dirt and required a good clean. This is where you’ll need a wire brush to scrub away at the threads of the fuel in/out lines. After a thorough clean, it’s worth giving them a good squirt of WD40 and leave it to soak. This gives you the opportunity to put the kettle on and get the Jaffa cakes out!
Did I mention you need a torch! Even on a bright sunny day (and we don’t have many of ‘em) it’s still very dark under there. So even with a flash, the picture of the old pump, squirted with WD40, didn’t turn out very well, sorry. After they have soaked long enough and you’ve finished off a packet of Jaffa Cakes, loosen, but DO NOT UNDO the nuts around the in/out pipes.
Unfortunately due to lack of space and a VERY short rubber hose from the petrol tank to the fuel pump, it is almost impossible to clamp the rubber hose closed, or to pull the pipe away from the pump. If you try and clamp the rubber hose to stop petrol from leaking out, it can damage the metal T piece and connecting pipe.
So the best way I found, and this only works if the petrol tank is virtually empty. Is to loosen the in/out pipes, unbolt completely the three bolts holding the bracket to the car, so the pump is free, disconnect the 12volt and earth wire’s and pull off the clear breather pipe at the top of the pump. You can now place a bowl under the pump, disconnect the IN pipe, and allow the excess petrol, hopefully not very much, to pour into the bowl. Now empty the bowl into a petrol can and close the cap. Repeat this with the OUT pipe, only a little fuel will need to be siphoned off.
Once all the petrol was safety contained in the petrol can, I then cleaned ALL the spills and the bowl. Safety first!
“ Bodge” number two, when the pump was removed, I found that the IN pipe did NOT have a brass olive, sealing the pipe! This will be rectified later, when re-fitting the new pump.
Once the old pump was removed from the car, I then stripped it down in the kitchen, (you may need an understanding wife or girlfriend at this point!) I found the mounting bracket, although Zinc plated, was showing sign’s of corrosion. So after a clean, I gave it a healthy coat of silver Hammerite. I know no one will ever see it under the car, but I know, so that’s all that matters!
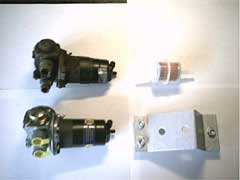
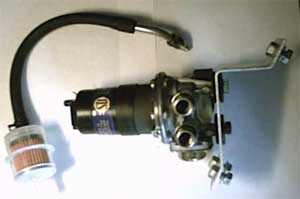
You do not get new brass unions with the pump, which is a little disappointing considering it’s cost, (around £80) so you shall have to remove the old one’s from the old pump, clean them up, re-seal the threads and screw them tightly into the new pump. I also decided to change to fuel filter at this point. I makes sense, and they only cost a few pounds.Re-fitting is just the reverse of removing. But I replaced the missing olive on the IN pipe. You may require a hand at this point (here comes your understanding wife or girlfriend again) to either hold the pump in position, or to fit the bolts back through the fire wall and into the bracket. I decided not to use the “bodged” screws but instead bought some new bolts and washers!
You will probably find that your 12 volt and earth lead connectors have seen betters days, usually turned green and crusty! I cut them off and re-crimped some new ones on. I also shortened the 12 volts lead. Just in case some one should pull the loom off by mistake, they shouldn’t touch and spark now. I threaded the loom back through the fire wall, re-fitting the grommet correctly, and connected the pump back up. Then re-filled the tank with the fuel from the petrol can.
A swift turn of the ignition key, and the pump quickly fired up, a lot quicker than before. After a good check for any leaks, all that was left to do was to re-fit the carpets and seat, lower the car to the ground and go for a blast.
LEW's Verdict
Although the job took about a day, first time around, because I had to work every thing out, it should take a good afternoon, now you know what to look for. It is a very fiddly job, and you’ll get plenty of grit in your face and hair, but if you’re fit enough and not to large (I’m being polite) then an experienced DIY mechanic should be able to do this without to much trouble.
![]()
This mod was performed by Pete Stone on his 1990 NA
If you try this, feel free to e-mail LEW with your Verdict at admin@lotusespritworld.com
Fuel Pump Replacement , Sport 300 pump/replacement
by artie
Okay, this is a relatively involved job. I'll try to make
it as painless as possible. The total project took me about 2 hours(okay
1 and 1/2 hours with my beer break). I was having some knocking issues in
Freescan so I decided to work by the process of elimination. Fuel pump came
up high on my list since I know the habit of our fuel tanks to develop rust
problems and didn't want rust crudding up my fuel delivery. Anyway, enjoy.
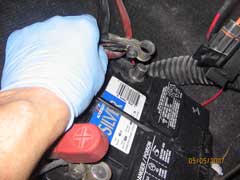
1. Disconnect negative battery cable.
2. Open fuel caps on both sides to release vapor(put out your ciggy first!)
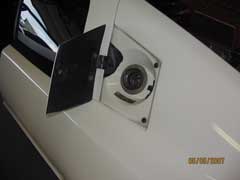
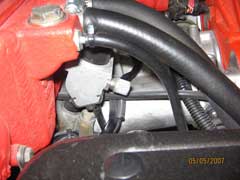
3. If you have a fuel pressure tester, hook it up to the Schrader valve on the fuel rail and release the fuel pressure into a suitable container, or you can run a small hose back to the fuel fill. If you don't you can crack the fuel line going to the filter, but you'll get fuel all over so have some rags to clean up the mess. Here's the valve
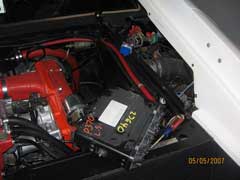
4. Remove the Right hand side(looking at the car from the rear)engine trim panel that covers the ECM. Disconnect the ECM and move it out of the way. You'll need to loosen the 8mm nuts that secure the ECM to the cradle.
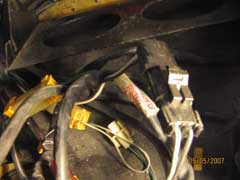
5. Remove the seat belt plastic cover for clearence. 6. Disconnect the fuel pump connector
7. Now, for Gods sake, please have some BRASS punches to undo the retaining ring. DO NOT, DO NOT use STEEL. Steel will spark and your Esprit will Blow up along with you and the house you live in! Wood will not work, I tried! Once you've removed the connector from the unit, carefully tap the retaining ring in a counterclockwise rotation to loosen the ring up. Next, you'll need to disconnect the fuel pipe fittings to remove the pump assembly. I can't recall the sizes but you'll need to use 2 wrenches per pipe to prevent twisting the pipe and breaking it as they are light steel. IIRC they are 17mm and 19mm.
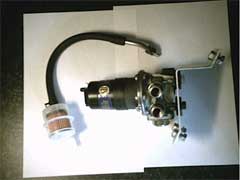
Once you do this, carefully pull the pump assembly up. Have a large rag ready to carry the unit out of the car with as it will be dripping fuel. Here's what the assembly looks like. The fuel level sending unit is on the assembly as well. Don't loose the float or you'll be empty all the time
8. Now that you have the assembly on the bench, carefully remove the pump from the feed tube and the level sender. Note the orientation, hopefully you got a new strainer for the new unit. Install the strainer, be sure it is secure on the lower end of the pump, this is the fuel pickup. Once you do this reinstall the new fuel pump onto the assembly and reverse the procedure. Button it all up and reattach the negative battery cable.
9. Now, don't try to start the car yet, there will be no fuel in the pump, just turn the key to the "On" position, this will activate the fuel pump relay and should pressurize the fuel system. You'll be able to hear the fuel rail pressurize. Check for any leaks. If none, you are Golden and on your way to some clean fuel!
|
|