UJ Replacement
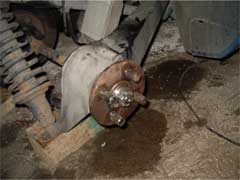
Esprit S1, S2 & S2.2The U/Js need to be changed every 10,000-12,000 miles, depending on usage and driving style. The harder the car is driven and the more traffic light races you take part in the more often they’ll need to be replaced! In the S1/2/2.2 cars, the drive shafts act as the main suspension link, backed up with the lower link and trailing arm – genius Chapman weight saving. The system was beefed up for the turbo as this setup would not take the extra power. Even with only 160bhp they take a lot of stick and need to be maintained regularly. Any opportunity you get to get under the car, have a grease gun handy…make sure the U/Js are greased up as lack off the slippery stuff will lead to rapid wear. This is most applicable to the near side pair as heat from the exhaust dries them out quickly.
To see if the U/Js are worn, all you have to do is give the drive shafts a wiggle. There should be no play at all in the joints. It’ll be obvious if there is. The shaft will turn without moving the gearbox flange or the shaft will move from side to side! Without regular checks they will let you know there is a problem by the sound of clunking when moving off. If all the bearing pins have fallen out or broken you’ll get a nasty sound of grinding metal…not pleasant.
WARNING: This job requires patience. Allow minimum of 2 hours for each drive shaft IF all goes well!
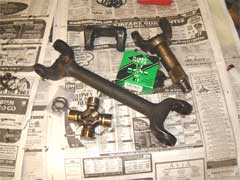
You will need the following parts:
UJ x 4
Axel Grease
You will need the following tools:
Vice
14mm spanner
torque wrench (min 200 lb/ft)
pliers
mole grips
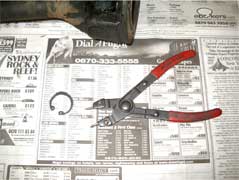
c-clip pliers
socketsProcedure:
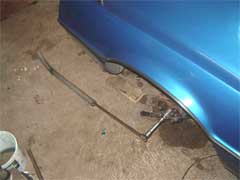
1. Remove rear wheel.2. Screw wheel studs back on.
3. Remove split pin from hub nut
4. Place a bar between the wheel nuts so that the hub cannot turn.
5. Take your very big lever and undo the hub nut. This is not easy as the nut has been done up to 200lb/ft - which is very tight!!!
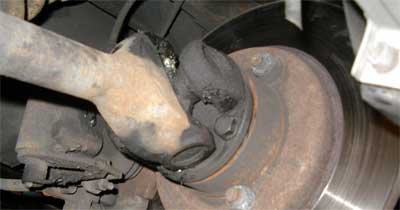
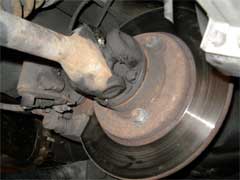
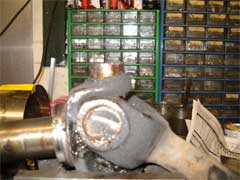
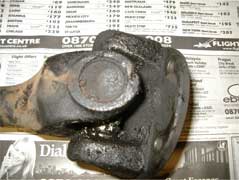
6. At the other end of the drive shaft undo the 4 bolts around the U/J. These are quite tricky as you can only get a spanner in when the U/J allows space so keep turning the drive shaft until this is possible.
7. Once undone, remove the bolts and then slide the shaft out of the hub.
Note: the hub bearing and washer may fall out at this time. Best to clean and re-grease while you have the opportunity.
Now the fun begins...
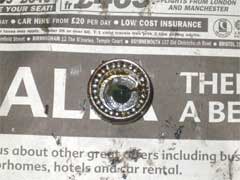
1. Remove all 8 C-clips (4 on each U/J)
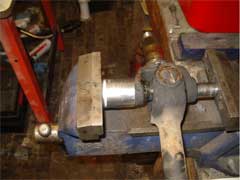
2. Take two sockets, one with a diameter smaller than the size of the U/J caps and the other with a larger internal diameter than the caps.
3. Place the U/J in the vice with a socket at each end and squeeze. The larger socket will allow the U/J to be pushed beyond the yoke.
4. Once the end cap is sticking out, clamp the yoke and twist the cap off with mole grips. If the caps have been greased this is quite easy. If they are rusted you may need to WD40 them. Once cap is off, flip over and using the socket technique, push out the opposite cap and remove.
5. You will now be able to slip the U/J out of one of it’s AXIS.
6. Repeat procedure until all old U/J’s are removed.
IMPORTANT: When removing the uncapped U/J’s they may not appear to want to come out. Before you get the big hammer out, make sure you don't damage the inside of the yoke as this will make inserting the new caps impossible. The internals must be totally smooth.
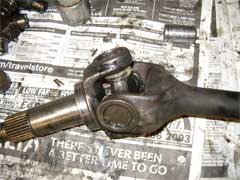
7. Clean the components.
Refitting
1. Take the new U/J and remove the 2 caps on opposite ends. IMPORTANT make sure all the tiny roller needles do not fall out. Grease should be holing them in but use your finger to make sure they're all lined up. Also make sure the location cone at the bottom of the cap is centralised.
.
2. Insert the U/J into the yoke.
IMPORTANT: Make sure both grease nipples are facing inwards towards each other from both ends of the drive shaft or you won't be able to get the grease gun on afterwards!
3. Place a little grease around the inside of the yoke and with a copper mallet GENTLY tap one of the caps in until it locates itself. Be careful you don't hit too hard or the rollers will fall out!
4. Locate the end of the U/J into this cap, flip over and insert the other cap.
5. The caps can be tapped in to a point where the ends of the U/J will have just located inside both caps then use the vice to push them in the rest of the way.
IMPORTANT: If the caps won't slide easily, it's possible some of the rollers have dislodged. You will need to remove both caps and start again. Be patient as if you bend one of the rollers you'll need a new U/J!
6. Once the caps are flush with the outside of the YOKE use the small socket on one side to push that side in then you can locate the new C-clip on the same side.
7. Flip over and push the U/J back the other way so it presses against the C-clip and there will then be space on the opposite side to insert the other C-clip.
8. Repeat procedure for the other ends of the U/J.
Congratulations!!
Now put it back together…
1. That’s the messy bit over and done with.2. Put the stub axle back into the hub and replace bearing, washer, and nut finger tight.
3. Bolt the inside end of the drive shaft back onto the gearbox end.
Muscle man time again…
1. Now to do up the hub nut to that crazy 200 lb/ft.
2. Again use the bar to stop the wheel from turning. Also support the bottom of the shock absorber with blocks of wood, as it will move when you apply pressure and your knuckles will be touching the ground before 200lb/ft is reached.
3. Finally don’t forget to put the split pin back in.
That should be it for the next 12000 miles or so (depending on how many traffic light sprints you get involved in).
Tips:
• Grease the new U/J’s as often as you can as the grease soon gets used up. In particular the left hand side, which is nearest the exhaust, dries out very quickly. Failure to keep them greased will drastically reduce the U/J lifespan.• If not greased the rollers fall out and the U/J eats it’s way though the caps and into the drive shaft…£££! Plus you will get nasty vibrations on acceleration before the horrid squeal of grinding metal…speaking from experience. (It’s difficult to get correct sized replacement U/J’s in the middle of France. But that’s another story…)
Verdict
Not a difficult job, just time consuming. It is not a job that can be rushed, things can (and did) go wrong. There are a few tricky bits as I’ve pointed out in the guide, mainly getting the new U/Js into the yokes, straight, without losing all the pin bearings. The scary bit is undoing and doing up the hub nut – safety here is paramount! Once done you’ve got a while before having to do it again.
This guide was supplied and performed by Peter Gentilli on his 1979 S2
If you have any comments, feel free to e-mail me with at admin@lotusespritworld.com
![]()
|
|