Expansion Tank Repair
DIY Repair saving you cash!
by Colin Mant, 1989 TurboThis is something I'm sure most cars suffer from - rusty expansion tanks! These metal tanks get eaten away over the years and can start leaking. Lotus changed these metal versions for plastic version in the mid-90s, which is a better solution. New ones are very expensive and there's a few aftermarket versions available, but why not just repair your own. If you catch it before it starts leaking it's more simple!
This is not a detailed study of how to refurb the tank, but the job is relatively straightforward, almost intuitive. Hopefully what the study does show, is what can be achieved with minimal effort and about £10. If you happen to have a spare can of paint and some rust treatment sitting in the garage, then it'll be a freebie!
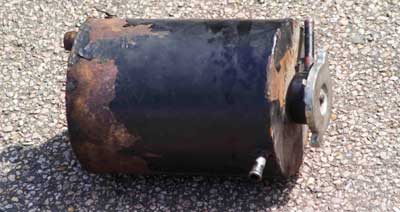
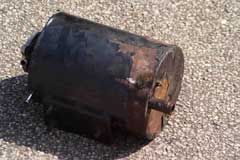
I've been asked lots of people if I could show them the engine, which I'm always happy to do, but every time the expansion tank was always very noticeable for the wrong reasons. It's always had paint flaking off and signs of rust. I've seen dozens more just like it, so I know its normal, but that didn't stop it bothering me every time I saw it. So, I decided to do something about it, mainly to smarten up the appearance of the engine bay, but also possibly prevent the rust taking hold and causing problems later.Follow this guide for a basic repair of your expansion tank.
DIY TIME
Time taken: 1 weekend, but most of this time was taken waiting between coats of paint to dry.
Time taken: Without the painting, removal and refitting were both under 1 hour..
You will need the following parts:
rust treatment and spray paint
You will need the following tools:
just a socket set and screw driver for the hose clamps
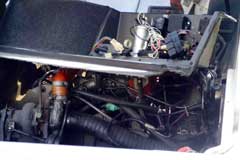

The panel and electrics needs to be removed first, to gain access to the 3 nuts holding on the tank. No need to unplug everything, just enough to lift the panel onto the engine out of the way. If its a one piece boot floor, then now might be a good time to do something about it - I cut mine across into 2 halfs some time ago, before working on upgrading the gear link pivots.
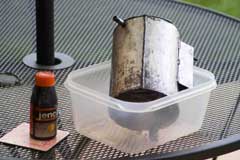

I didn't bother to drain the system first, I just took what water came out as I was disconnecting the hoses, into a bowl directly below. The antifreeze was quite fresh, so it only needed a top up when I was finished.

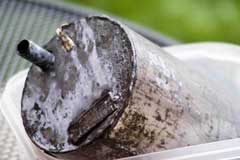
The tank looked bad, but after a sanding with a dremel, it was surprisingly clean and solid. A little anti-rust treatment for good measure, then after masking all the openings with tape I sprayed with (smooth) hammeright for extra rust protection. When dry, I then sanded paint off the electrical contacts for the low water warning system.
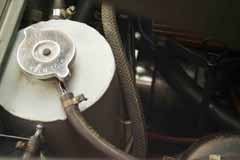
Fitting was a straightforward reversal of taking it out.Verdict
It was well worth doing. The photos show how much of a difference it makes, the expansion tank looks as good as new now. What's more, it didn't take much time or effort. Less than 1 hour to get the tank off. Half an hour with a Dremel to clean it up. Sparying takes no time at all and you can go off and do other thing between coats. Another hour at most to fit it all back and replace the coolant. As an after thought, it might be a good time to replace some of those rubber hoses with silicon upgrades!
This maintenance was performed by Colin Mant on his 1989 Turbo
If you have any comments, feel free to e-mail us at admin@lotusespritworld.com
![]()
|
|