Instrument binnacle removal
and replacement of dash panels!
By paul chandler
The reason I am doing this is to change my wood dash panels. This is for cars made before 1989. If you have a 1990-on Esprit then the cowling over your binnacle will unbolt and lift off to enable access to the instruments. There is info on that process on Sanj’s site here: http://turboesprit.tripod.com/
If you have a pre ’90 Esprit then you need to remove the binnacle and turn it upside down to get to the instruments or change the wooden dash. I could not find any photos for this procedure so I compiled this guide.
Being able to remove it will also be a useful way of getting to any dials /switchgear easily on the workbench, and you will find it is also necessary to remove the binnacle to do other jobs on the car, so it’s handy to know how.Time 3-4hrs (if I did it again I think about 1-2)
You will need the following parts:
A new dash mask set.
You will need the following tools:
A torch
19mm socket (steering wheel)
10mm socket (binnacle fixings)
Wire cutters (for any cable ties)
In the workshop (to change the dash panels):
10mm, 11mm and 7mm sockets And open spanners.
A Philips screwdriver.Removal & Fitting
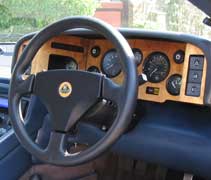
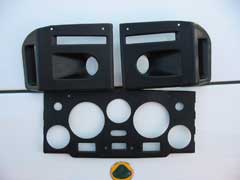
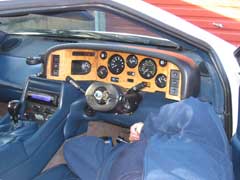
I am taking off my cracked wood dash panels and replacing them with the standard black plastic ones. This guide will also enable you to change your existing cracked wood for a new set. It is 100% down to personal preference but I prefer the simpler black finish.
Should you have an earlier esprit and are thinking of fitting the SE’s wood dash then check first it will fit, as the SE layout may be slightly different (ice warning lights etc).
This was done on a pre ’90 stevens car, I assume the process will be the same for the G-cars. If anyone knows this to be true then let Kato know so it can be stated here!
First job:
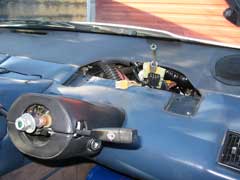
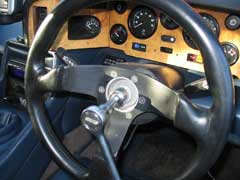
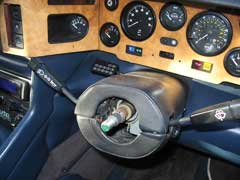
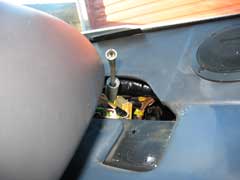
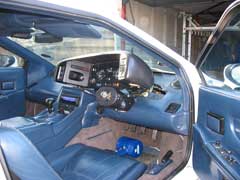
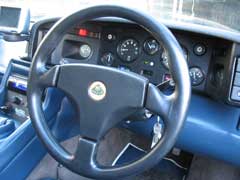
Centre the steering wheel so you know where it goes back! pull off the steering wheels centre pad and remove the wheel with a 19mm socket. (hold the wheel tight with one hand and turn socket with the other). Put the wheel somewhere safe.
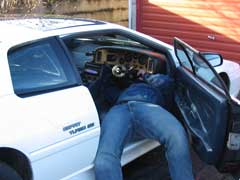
Now tilt the seat as far forward as it will go, this will enable you to slide it back as far as possible. I would suggest you have a torch, some cutters and a 10mm socket drive in the footwell when you slide yourself in there (you will see the bolts straight away so no point climbing out to get tools).
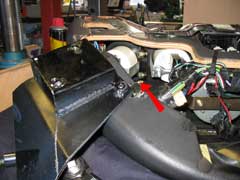
Undo the four bolts. I also cut some cable ties that were around the binnacle harness, they would have prevented me gaining enough slack to lift it off later.
Give yourself a minute or two to let the blood drain back!
Next, gently lift the binnacle. At all times be aware of its metal mounting plates as these could damage your leather if you are not careful. There are three things connecting the binnacle to the car and I would suggest you do them in the order you are able to get to them easy, this will vary from car to car. They are:
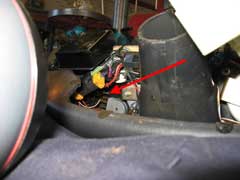
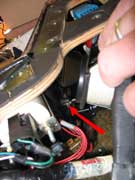
The heater tube to the binnacle de-mist vent. (this just pulls off easy).
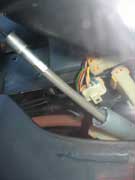
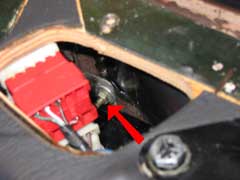
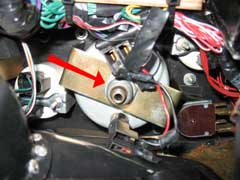
The wiring harness. (this has four plugs, all are different so no need to label).Then there is the speedo cable, this has a metal collar around it. Unscrew the collar (by hand) and the cable will just slide out, It is much harder to get back in as it is done entirely by feel. The cable end is square and needs aligning with is socket before the collar can be screwed back on.
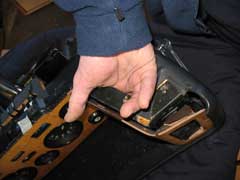
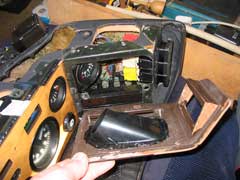
The binnacle will now lift off. Take it to your worktable now.

I took advantage of it being off to clean and feed the leather around the front window. If you wanted to change that speaker then now is the time too.Lay the binnacle upside down on something soft so the leather on the top of the cowling is not damaged.
I unscrewed some small bits of trim off the bottom first.
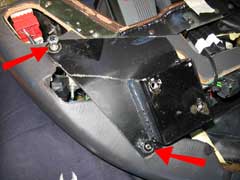
The side panels of the dash need to come off first, each of these has two bolts holding them in. The first one you can get at with a 7mm open spanner through a hole in the binnacles ply housing.
The second bolt is very hard to see and you need to unbolt the binnacles metal mounting plate to get to it, the mounting plate is held in by two bolts, one is 11mm and accessible from the outside, the next is 10mm and needs to be loosened off from the inside with an open spanner. Then the mounting plate will swing clear to reveal a hole above the second of the panels fixing bolts.
You still cannot get at the bolt with a spanner so you need to unbolt the dial that’s in the way (fuel dial on the R/H side, Oil on the L/H side), there are two bolts holding the dial on and it needs adjusting for the new dash anyway. Now you can get to the second bolt and remove the side panel!
Repeat this process for the otherside. It is worth noting that as the binnacle cowling is nice and rounded, and screws/nuts or washers you drop will find their way to the bottom with the odd shake or two – so don’t get maddened trying to fish them out! (just be sure they are all accounted for)
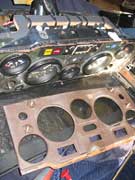
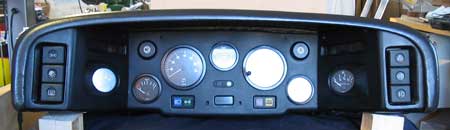
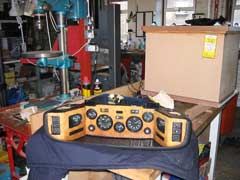
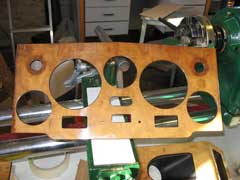
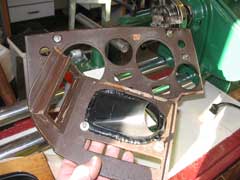
The centre panel is easy to remove by comparison, a long 7mm drive gets to all four nuts easy and it comes straight off. Now make sure you have a full set of washers/nuts and that none are left in the binnacle.The original wood set
As you can see from the photos, I worked on the binnacle in my fathers woodwork shop. He was stunned such a nice hardwood veneer was put onto such a thin and flexible ply (only 3mm thick in places). Where the ply is of varying thin/thick profiles across its length and has very thin sections between the dials it is understandable it will expand differently to the harder veneer and laquer on its face.This is a shame as the ply is a numbered set, and the grain on the two end sections is mirrored in the centre section, this is the kind of detailing you find in Rollers!

I have no idea if the newer cars dash or replacement dash panels are thicker or better constructed.
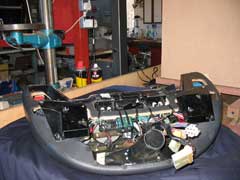
If you are changing your plastic dash to a wood one, you will also need the two plastic cowls seen on the back of my wood side panels. These are built into your plastic dash but do not come with the wood dash set – so don’t take your car all to bits and find you are missing these!

Fitting the plastic dash set was easy as they screw on from the front. I gave all my dials a good clean prior to fitting.
In some places the screw holes were missing their plastic ‘bobbin’ or insert to accept the screw, I found an expanding screw fixing did the job perfectly (and will never be seen).
Adjust the position of the two side dials to suit the dash again and bolt the mounting brackets back on. Have a check that you have not unplugged any in the binnacle connections by accident.
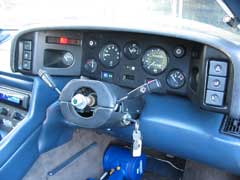
After giving the leather of the binnacle a good clean and condition, I took it back to the car. To re-fit it is just a reverse of the first process. I would suggest re-attaching the speedo cable first, this is fiddly and can only be done by feel as there is not enough slack on it. Be patient and have a good look at where you are trying to fit it first, a small mirror ‘might’ help if placed up by the windscreen perhaps, but I managed to do it after several attempts. Now plug back in the wiring and re-attach the heater vent. I found I could bolt it back in by reaching under the dash and sliding the bolt through, this way I could move the binnacle to make it line up. Now check everything works. All switches and dials.
Bolt your wheel on and go for a spin, I knew my speedo was fine as my Sat-nav gives Mph readout and it matched.
Verdict
Not too hard, just a bit fiddly and time consuming so allow enough time. I am well happy with the results and must say thanks to Pete (Pitstoppete) for giving me his old black dash panels (he was fitting new wood ones instead – the opposite of what I have just done).
This mod was performed by Paul Chandler on his 1989 SE
If you have any comments on this article email: admin@lotusespritworld.com
G-Car Removel
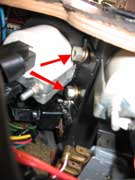
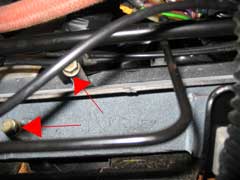
Attempting to move the binnicale on my car to access the front speaker on the drivers side, looked at the LEW site for binnical removal but it does not marry with the setup on my G car, there appears to be two bolts under the binnacle where the bracket secures to the dash frame, but underneath there are no visible bolts which is frustrating, how are these ones removed? any shortcuts?
Julian Goldacre
![]()
|
|